
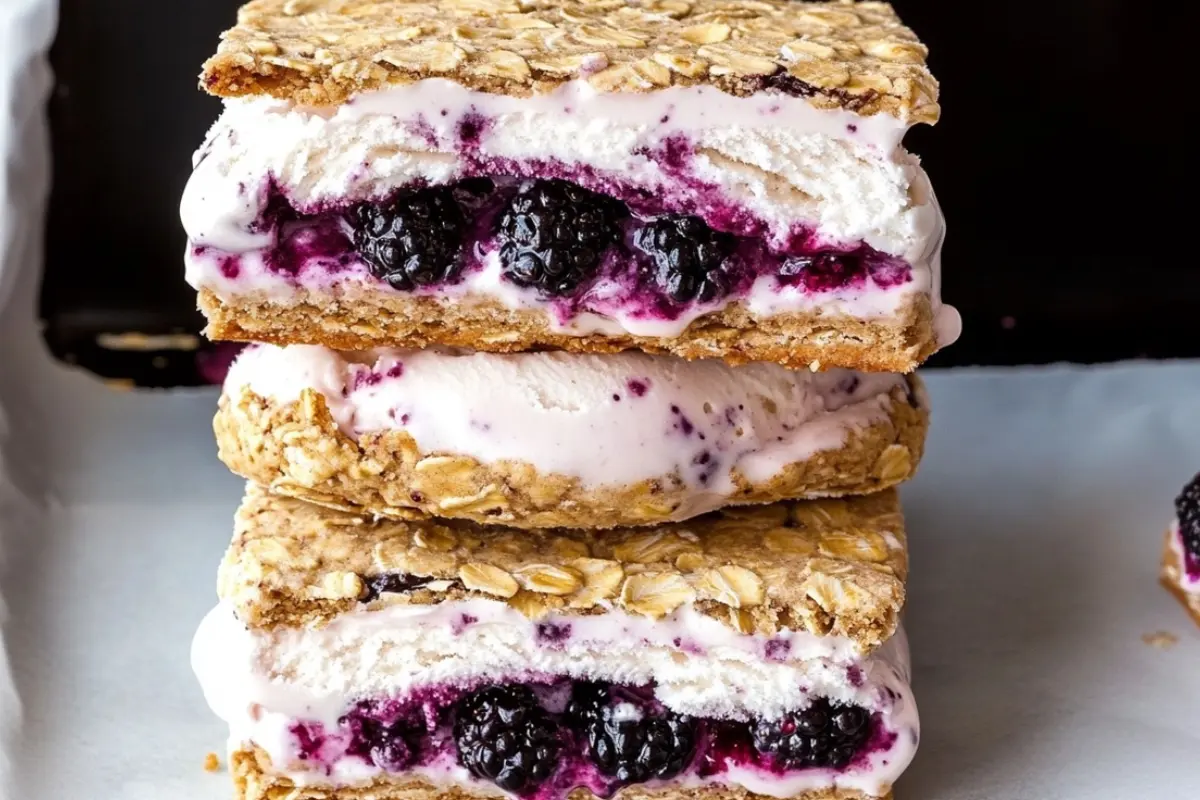
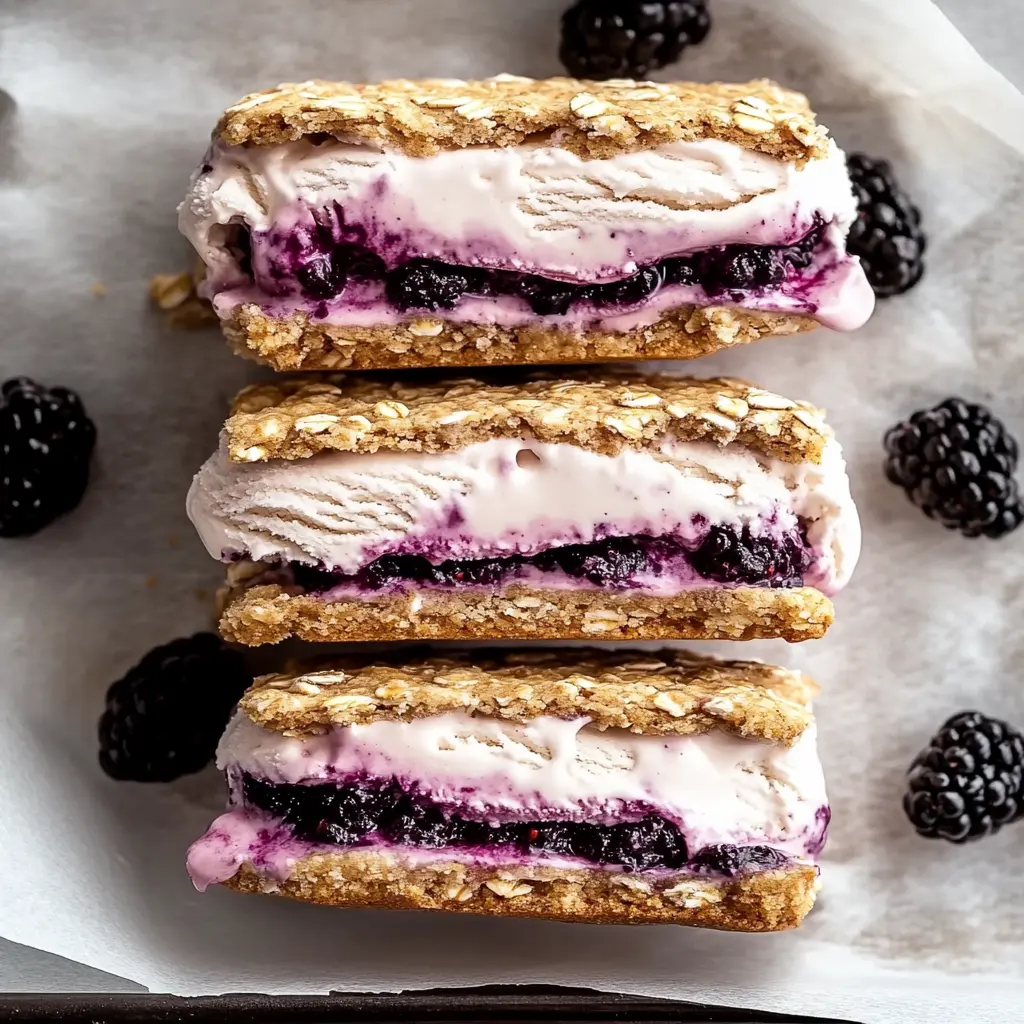
Before we dive into this dreamy recipe, I just want to say THANK YOU. Seriously. Every message, every comment, every photo you send when you try one of my recipes—it means the world to me. It’s because of this amazing community that I’m inspired to keep creating sweet moments and memorable bites. So today, I’m sharing something that is pure joy in dessert form: Vegan Oatmeal Berry Swirl Ice Cream Sandwiches.
This one is for those warm sunny days when you want a nostalgic treat that’s just a bit elevated. Think soft, chewy oatmeal cookies hugging layers of creamy, dairy-free vanilla ice cream with a vibrant, tangy berry swirl rippling through it. I promised you versatile, and here’s proof! These sandwiches are beautiful to look at, ridiculously good to eat, and surprisingly easy to make. Let’s get into it!
Ingredients
For the Oatmeal Cookie Layers:
-
2 cups quick-cooking oats (use gluten-free if needed)
-
1½ cups all-purpose flour (or gluten-free 1:1 blend)
-
1½ teaspoons baking powder
-
1½ teaspoons ground cinnamon (optional but cozy!)
-
2 teaspoons cornstarch
-
1 teaspoon salt
-
1½ cups brown sugar
-
1 cup melted vegan butter (stick-style for best results)
-
½ cup plant-based milk (almond, soy, oat—your call)
-
1½ tablespoons vanilla extract
For the Berry Swirl:
-
2 cups blackberries (fresh or frozen)
-
4 tablespoons granulated sugar
-
1 tablespoon lemon juice
-
1 tablespoon cornstarch
For the Ice Cream Layer:
-
2 to 3 pints vegan vanilla ice cream, softened slightly
How to Make Vegan Oatmeal Berry Swirl Ice Cream Sandwiches
Step 1: Bake the Cookie Base
Start by preheating your oven to 350°F (175°C). Line a half-sheet baking pan (about 18×13 inches) with parchment paper, leaving some overhang on the long sides.
In a mixing bowl, whisk together the oats, flour, baking powder, cinnamon (if using), cornstarch, and salt.
In a separate large bowl, stir together the brown sugar, melted vegan butter, plant milk, and vanilla. Pour the dry mixture into the wet and mix until just combined—it’ll be thick and a little sticky, which is exactly what we want.
Press the dough evenly into your prepared pan. It helps to use a second piece of parchment and a rolling pin or glass to get an even layer. Bake for 10–12 minutes until the top looks set and the edges are just starting to turn golden. Don’t overbake! You want these soft so they’re easy to bite into once frozen.
Let the cookie layer cool completely in the pan. Once cool, use the parchment to lift it out and cut it in half crosswise to create two cookie “slabs.” Chill both pieces in the fridge or freezer to firm up.
Step 2: Make the Berry Swirl
While the cookie base cools, make that gorgeous berry swirl. In a small saucepan over medium heat, combine the berries and sugar. Stir occasionally and let the berries break down—this takes about 5 minutes.
Mix the lemon juice and cornstarch in a small bowl to form a slurry, then stir it into the berry mixture. Keep stirring until it thickens up nicely. Remove from heat and let it cool completely. It should look like glossy berry jam with just the right amount of tartness.
Step 3: Assemble the Ice Cream Sandwiches
Line a 9×13-inch baking dish (or use the same sheet pan, cleaned and re-lined) with parchment paper. Place one of your chilled cookie slabs on the bottom.
Spread half of your softened vegan vanilla ice cream over the cookie. Then spoon on half of the berry swirl and gently use a butter knife to create swirls (don’t overmix!). Add the remaining ice cream on top and repeat with the rest of the berry swirl.
Top with the second cookie slab and press down gently to help everything adhere. Cover with plastic wrap or foil and freeze for at least 3–4 hours, until fully set.
Step 4: Slice and Enjoy
Once frozen solid, lift the whole slab out using the parchment and place it on a cutting board. Slice into bars or squares—whatever size calls to you! I love wrapping each one in parchment or wax paper for easy grab-and-go treats.
Helpful Tips
-
Don’t skip the parchment paper! It’s key to easy removal and clean slicing.
-
If your ice cream gets too soft while assembling, pop everything into the freezer for 15–20 minutes before continuing.
-
Want extra flair? Roll the edges of your sandwiches in chopped nuts, shredded coconut, or mini chocolate chips before freezing.
Substitutions and Variations
Different Fruits: Not a fan of blackberries? Use raspberries, strawberries, blueberries—or a mix! Just keep the proportions the same.
No Time for Homemade Swirl? Swap in your favorite berry jam (about ½ cup) and swirl that directly into the ice cream.
Add-Ins Galore: Stir chocolate chips, crushed nuts, or even dried fruit into your cookie dough for added texture and flavor.
Ice Cream Options: Vanilla is classic, but you could easily use coconut, almond fudge, or berry-flavored vegan ice cream if you’re feeling bold.
Frequently Asked Questions
Do I need to churn my own ice cream?
Nope! This recipe is perfect with store-bought vegan ice cream. Just let it soften a little so it’s easy to spread.
Can I make this gluten-free?
Yes! Use certified gluten-free oats and a 1:1 gluten-free flour blend. It bakes up beautifully.
How long do these keep in the freezer?
They’re best within a month, but good luck making them last that long. I blink and they’re gone!
Can I use oil instead of vegan butter?
You can, but the flavor and texture will be slightly different. Vegan butter gives the best chew and buttery notes for the cookies.
Storage Instructions
Once cut, wrap each ice cream sandwich individually in parchment paper or wax paper and store in an airtight container in the freezer. This keeps them fresh and prevents freezer burn. They’ll stay perfect for 3–4 weeks, though I doubt they’ll stick around that long!
More Dessert Inspiration
If you loved these, I’ve got a few other recipes you might want to try next:
I hope you make a batch of these, stash them in your freezer, and feel a little spark of joy every time you pull one out. They’re everything you want in a summer treat—creamy, fruity, comforting, and just a little indulgent. Let me know if you try them. I’d love to hear how they turn out for you!