

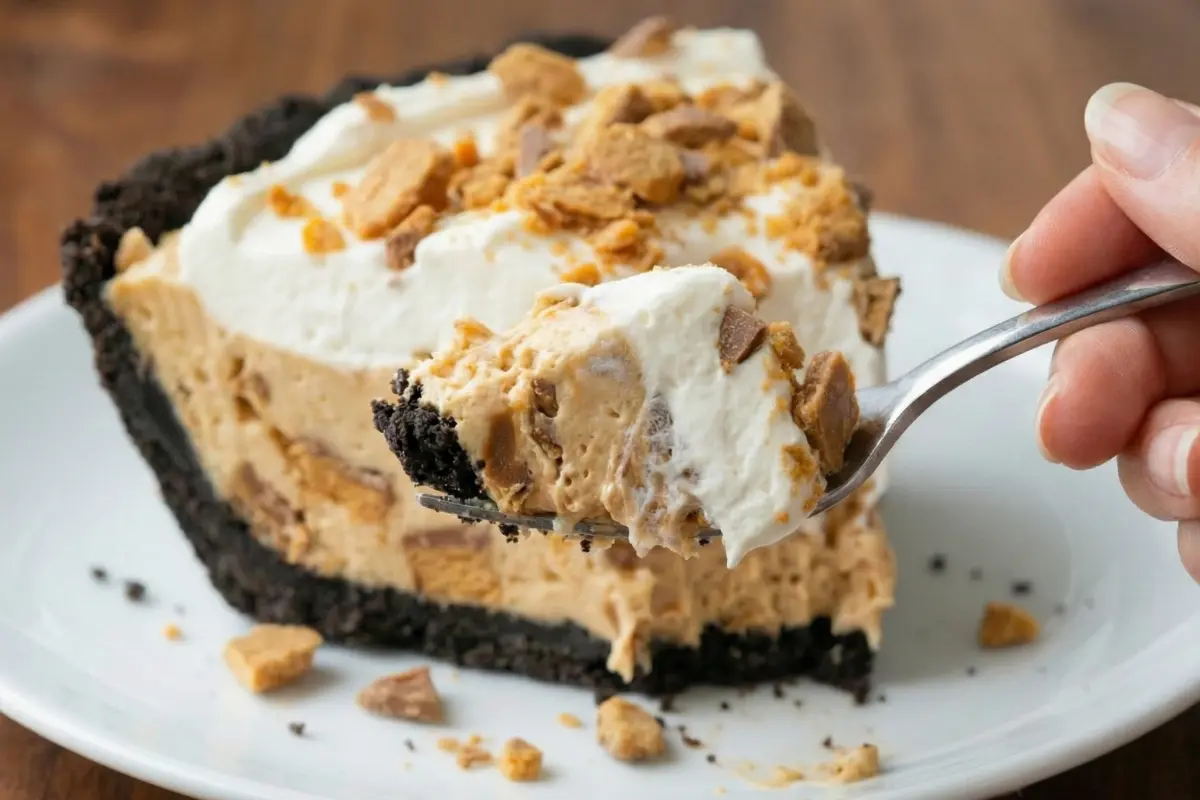
No Bake Butterfinger Pie is the ultimate dessert for peanut butter and chocolate lovers who crave something indulgent yet incredibly simple to prepare. With a rich Oreo crust, a velvety peanut butter and cream cheese filling, and generous chunks of Butterfinger candy bars folded throughout, this pie delivers irresistible flavor in every bite. Perfect for birthdays, potlucks, holidays, or weekend treats, it requires just 20 minutes of prep time and a few hours of chilling. No oven, no complicated techniques, just pure creamy, crunchy, chocolate peanut butter bliss that always earns rave reviews.
Why You’ll Love This No bake Butterfinger Pie
There are countless reasons why this Butterfinger Pie deserves a spot in your dessert rotation.
First, it is completely no bake. That means no heating up the kitchen and no worrying about over baking. It is perfect for warm weather or busy days when you need a stress free dessert.
Second, the texture combination is unbeatable. The Oreo crust provides a firm chocolate base, while the filling is smooth and fluffy thanks to cream cheese and whipped topping. The chopped Butterfinger bars add the perfect crunchy contrast.
Third, it is make ahead friendly. Since the pie needs at least 4 hours to chill, it is ideal for preparing the day before an event. In fact, many home bakers find the flavor deepens and the texture sets even better after overnight refrigeration.
Finally, it serves 8 generous slices, making it a crowd pleasing dessert that feels bakery worthy but is made with simple, affordable ingredients.
Ingredients
Crust
-
24 Oreos
-
7 tablespoons melted butter
Filling
-
1 package 8 ounces cream cheese, room temperature
-
1 cup confectioners sugar
-
¾ cup creamy peanut butter
-
1 cup chopped Butterfingers, about 12 fun size bars
-
8 ounces thawed whipped topping
Optional Topping
-
Whipped topping or Cool Whip
-
Additional chopped Butterfingers
Step by Step: How to Make No Bake Butterfinger Pie
-
Prepare the pie dish
Lightly grease a 9 inch pie dish with butter or shortening. This prevents sticking and ensures clean slices when serving. -
Make the Oreo crust
Place the Oreos in a food processor and pulse until they turn into fine, even crumbs. Slowly drizzle in the melted butter while processing on low speed. Continue blending until the crumbs are fully coated and resemble wet sand. -
Shape and chill the crust
Press the crumb mixture firmly into the bottom and up the sides of the prepared pie dish. Use the bottom of a measuring cup to compact the crust evenly. Place it in the freezer for 20 minutes to firm up. -
Prepare the filling
In a large mixing bowl, beat the softened cream cheese, confectioners sugar, and peanut butter with an electric mixer until completely smooth and creamy. Scrape down the sides of the bowl to ensure everything is fully incorporated. -
Add the candy
Stir in the chopped Butterfingers using a spatula. Distribute the pieces evenly for crunchy bites throughout the pie. -
Fold in whipped topping
Gently fold in the thawed whipped topping. Use slow, sweeping motions to maintain the airy texture. The mixture should be light, fluffy, and fully blended. -
Assemble the pie
Spoon the filling into the chilled crust. Smooth the top with a spatula for an even finish. -
Chill until set
Refrigerate the pie for at least 4 hours or until the filling is firm and sliceable. For best results, chill overnight. -
Garnish and serve
Before serving, top with extra whipped topping and additional chopped Butterfingers if desired. Slice, serve chilled, and enjoy.
Helpful Tips
Use room temperature cream cheese. Cold cream cheese can create lumps and make mixing difficult.
Do not skip freezing the crust. This step helps it hold together when adding the filling.
Chill for the full 4 hours. The filling needs time to firm up properly for clean slices.
For easier slicing, dip a sharp knife in warm water and wipe it clean between cuts.
If you do not have a food processor, place the Oreos in a sealed zip top bag and crush them with a rolling pin until fine.
Substitutions And Variations
Swap the Oreo crust for a graham cracker crust if you prefer a slightly less intense chocolate flavor.
Use crunchy peanut butter for even more texture in the filling.
Try different candy mix ins such as chopped Reese cups or chocolate chips for a fun twist.
Make it gluten free by using gluten free chocolate sandwich cookies.
For a richer chocolate flavor, drizzle melted chocolate over the top before chilling.
If you prefer a homemade whipped cream option, replace the whipped topping with 3 cups of freshly whipped heavy cream sweetened with a few tablespoons of powdered sugar.
Storage Instructions
Store Butterfinger Pie covered tightly with plastic wrap or in an airtight container in the refrigerator for up to 4 days.
For longer storage, you can freeze the pie for up to 1 month. Wrap it securely in plastic wrap and aluminum foil to prevent freezer burn. Thaw overnight in the refrigerator before serving.
If freezing individual slices, separate them with parchment paper to make grabbing a single portion easier.
Avoid leaving the pie at room temperature for more than 2 hours, especially in warm environments, as the filling contains dairy.
Nutritional Information
Per slice, based on 8 servings, approximate values:
-
Calories: 480 to 520
-
Fat: 32 grams
-
Saturated Fat: 16 grams
-
Carbohydrates: 45 grams
-
Sugar: 35 grams
-
Protein: 8 grams
Serving Suggestions
Serve Butterfinger Pie chilled straight from the refrigerator for the best texture.
Pair it with a hot cup of coffee or a cold glass of milk to balance the sweetness.
For an elegant presentation, add a drizzle of chocolate sauce and a sprinkle of crushed candy on each slice.
You can also serve smaller slices alongside fresh berries to add a refreshing contrast to the rich peanut butter filling.
For parties, consider making mini pies in muffin tins for individual servings that are easy to transport and share.
Frequently Asked Questions About Butterfinger Pie
Can I make Butterfinger Pie ahead of time?
Yes, this pie is perfect for making ahead. In fact, chilling it overnight often improves the texture and flavor. Prepare it up to 24 hours in advance and keep it refrigerated until ready to serve.
Can I use natural peanut butter?
It is best to use conventional creamy peanut butter. Natural peanut butter can separate and make the filling less stable.
Do I have to use a food processor for the crust?
No. You can crush the Oreos in a sealed bag using a rolling pin. Just make sure the crumbs are very fine for the best texture.
How do I know when the pie is set?
The center should feel firm when gently pressed. If it still feels soft or jiggly, allow additional chilling time.
Can I freeze Butterfinger Pie?
Absolutely. Freeze it tightly wrapped for up to one month. Thaw in the refrigerator before serving for the best consistency.
Final Thoughts
Thank you so much for spending time in the kitchen with this Butterfinger Pie recipe. It is one of my favorite easy desserts because it delivers big, bold peanut butter and chocolate flavor with minimal effort. I love how simple it is to prepare, yet it always feels special enough for celebrations and gatherings. The creamy filling, crunchy candy pieces, and chocolate crust make every bite unforgettable. I truly hope you enjoy making and sharing this pie as much as I do. Happy baking, and thank you for being part of this wonderful community of dessert lovers.
Print
No Bake Butterfinger Pie
- Total Time: 4 hours 20 minutes
- Yield: 8 slices 1x
- Diet: Vegetarian
Description
Butterfinger Pie is a creamy no bake dessert made with a chocolate Oreo crust, smooth peanut butter filling, and crunchy Butterfinger candy pieces. This easy make ahead pie is perfect for holidays, birthdays, and family gatherings.
Ingredients
Crust
24 Oreos
7 tablespoons melted butter
Filling
1 package 8 ounces cream cheese, room temperature
1 cup confectioners sugar
¾ cup creamy peanut butter
1 cup chopped Butterfingers about 12 fun size bars
8 ounces thawed whipped topping
Optional Topping
Whipped topping
Additional chopped Butterfingers
Instructions
- Prepare the pie dish
Lightly grease a 9 inch pie dish with butter or shortening. This prevents sticking and ensures clean slices when serving. - Make the Oreo crust
Place the Oreos in a food processor and pulse until they turn into fine, even crumbs. Slowly drizzle in the melted butter while processing on low speed. Continue blending until the crumbs are fully coated and resemble wet sand. - Shape and chill the crust
Press the crumb mixture firmly into the bottom and up the sides of the prepared pie dish. Use the bottom of a measuring cup to compact the crust evenly. Place it in the freezer for 20 minutes to firm up. - Prepare the filling
In a large mixing bowl, beat the softened cream cheese, confectioners sugar, and peanut butter with an electric mixer until completely smooth and creamy. Scrape down the sides of the bowl to ensure everything is fully incorporated. - Add the candy
Stir in the chopped Butterfingers using a spatula. Distribute the pieces evenly for crunchy bites throughout the pie. - Fold in whipped topping
Gently fold in the thawed whipped topping. Use slow, sweeping motions to maintain the airy texture. The mixture should be light, fluffy, and fully blended. - Assemble the pie
Spoon the filling into the chilled crust. Smooth the top with a spatula for an even finish. - Chill until set
Refrigerate the pie for at least 4 hours or until the filling is firm and sliceable. For best results, chill overnight. - Garnish and serve
Before serving, top with extra whipped topping and additional chopped Butterfingers if desired. Slice, serve chilled, and enjoy.
Notes
Make sure the cream cheese is fully softened to prevent lumps.
Freeze the crust before adding the filling for clean slices.
Chill for at least 4 hours for best texture, overnight is even better.
Store covered in the refrigerator for up to 4 days.
For easier slicing, dip a knife in warm water and wipe clean between cuts.
- Prep Time: 20 minutes
- Cook Time: Chill Time 4 hours
- Category: Dessert
- Method: No-Bake
- Cuisine: American