
Some desserts just scream “summer potluck,” and this Raspberry Cheesecake Lush is at the top of that list. I’ll never forget the first time I tried a slice of a similar layered dessert at a family BBQ. The combination of a crunchy cookie crust, a tangy and sweet cheesecake filling, a bright, fruity Jello layer, and a cloud of whipped topping was pure magic. It was cool, refreshing, and disappeared from the dessert table in minutes.
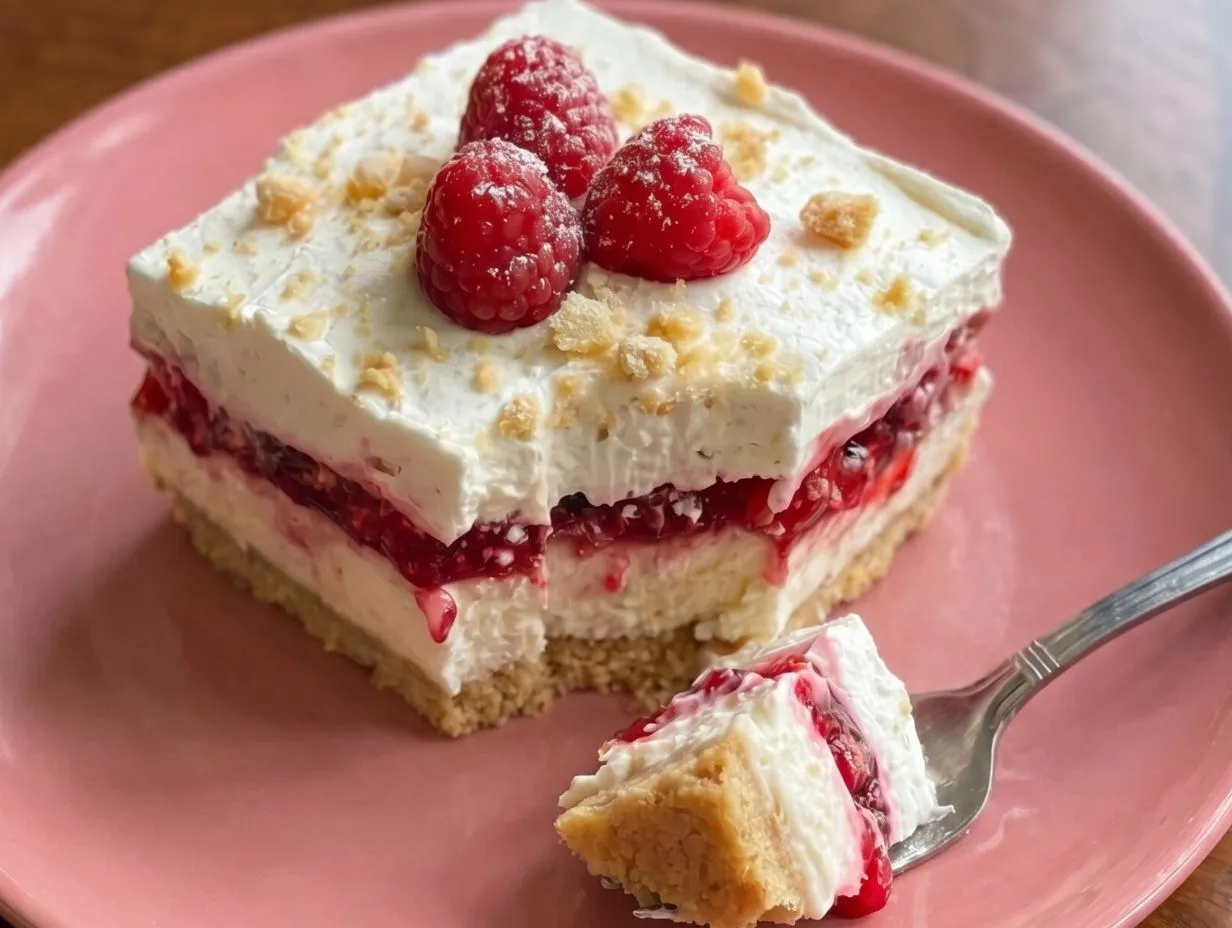
This Raspberry Cheesecake Lush is a stunning no-bake dessert that delivers on every level. It features four distinct, delicious layers: a buttery Golden Oreo crust, a creamy lemon-kissed cheesecake filling, a vibrant raspberry gelatin layer studded with whole berries, and a final fluffy topping of Cool Whip. It’s the perfect make-ahead treat for any gathering, from holiday parties to casual summer get-togethers.
Why make this recipe
If you’re looking for a dessert that’s guaranteed to impress with minimal effort, this is it. Here’s why you’ll fall in love with this recipe:
It’s a No-Bake Wonder: On a hot day, the last thing you want to do is turn on the oven. This entire dessert comes together in the fridge, keeping your kitchen cool and comfortable.
Layers of Flavor and Texture: Every bite is an adventure! You get the crunchy, sweet crust, the rich and tangy cheesecake, the jiggly, tart raspberry layer, and the light, airy whipped topping. It’s a symphony of sensations.
Perfect for Parties: Made in a 9×13 pan, this recipe yields 18 generous servings, making it ideal for feeding a crowd. It’s a certified showstopper on any dessert table.
Make-Ahead Friendly: The best part? It needs to chill for at least 8 hours, so it’s the perfect dessert to prepare the day before your event. This frees up your time on party day for other things!
Ingredients
- 27 whole Golden Oreos
- 7 tablespoons salted butter (melted)
- 8 ounces cream cheese (softened)
- 1 cup powdered sugar
- 1 tablespoon lemon zest
- 1 tablespoon fresh lemon juice
- 1 tub (8 oz) Cool Whip (thawed)
- 1 box (3 oz) raspberry gelatin
- 1 cup boiling water
- 2 cups frozen raspberries
- 1 tub (8 oz) Cool Whip (thawed)
How to make Raspberry Cheesecake Lush
Step 1: First, let’s make that irresistible crust. Place the Golden Oreos in your food processor and pulse them until they become fine crumbs. With the processor on low, slowly drizzle in the melted butter. Keep mixing until the crumbs start to clump together. Press this mixture firmly and evenly into the bottom of a 9×13-inch baking pan. Pop it in the freezer for about 20 minutes to set up.
Step 2: While the crust is chilling, it’s time for the cheesecake layer. In a large mixing bowl, combine the softened cream cheese, powdered sugar, lemon zest, and fresh lemon juice. Use an electric hand mixer to beat these ingredients together until the mixture is completely smooth and free of any lumps. Gently fold in one 8-ounce tub of thawed Cool Whip, mixing on low speed just until it’s combined.
Step 3: Carefully spread the cheesecake mixture over the chilled crust. The key here is to spread it in a perfectly even layer, making sure to push it tightly against all four sides of the pan. This creates a seal that will prevent the Jello layer from leaking down into the crust.
Step 4: Now for the vibrant raspberry layer! In a separate bowl, add the raspberry gelatin powder and pour the boiling water over it. Whisk vigorously until all the gelatin crystals have completely dissolved. Immediately stir in the frozen raspberries. The cold berries will cause the gelatin to thicken very quickly, so be ready to work fast!
Step 5: Gently pour the thickening raspberry mixture over the cheesecake layer. Use a spatula to spread the raspberries out as evenly as you can. Top everything with the second 8-ounce tub of thawed Cool Whip, spreading it gently to cover the raspberry layer completely.
Step 6: Cover the pan with plastic wrap or a lid and place it in the refrigerator to chill for at least 8 hours. Chilling overnight is even better, as it allows the layers to fully set, making for beautiful, clean slices.
How to serve Raspberry Cheesecake Lush

This dessert is best served chilled, straight from the refrigerator. When you’re ready to serve, cut it into squares. For an extra touch of elegance and a hint of what’s inside, you can garnish each slice with a few fresh raspberries, a sprinkle of leftover Golden Oreo crumbs, or even a fresh mint leaf. It’s a beautiful and refreshing dessert that’s perfect on its own.
How to store Raspberry Cheesecake Lush
To store any leftovers, simply cover the pan tightly with plastic wrap or a lid and keep it in the refrigerator. The Raspberry Cheesecake Lush will stay fresh and delicious for up to 4 days. I do not recommend freezing this dessert, as the texture of the gelatin and Cool Whip can change upon thawing, becoming watery.
Tips to make
Soften Your Cream Cheese: For the smoothest, lump-free cheesecake layer, make sure your cream cheese is truly at room temperature. Let it sit on the counter for at least an hour before you begin.
Create a Good Seal: Don’t rush spreading the cheesecake layer. Taking the time to press it firmly against the sides of the pan is the most important step for preventing the jello from leaking.
Work Quickly with the Jello: The recipe isn’t kidding—the gelatin will thicken almost instantly once you add the frozen raspberries. Have your pan ready and be prepared to pour and spread immediately.
Don’t Skimp on Chilling Time: Patience is key! Letting the dessert set for at least 8 hours (or preferably overnight) is crucial for the layers to firm up properly. This ensures you get clean, beautiful slices when you serve.
Try a Variation: Feel free to get creative! You can swap the Golden Oreos for a classic graham cracker crust or shortbread cookies. You can also experiment with other gelatin and frozen fruit combinations, like strawberry or peach.
FAQs About Raspberry Cheesecake Lush
Can I use fresh raspberries instead of frozen?
It’s highly recommended to use frozen raspberries for this recipe. The frozen fruit is what helps the gelatin layer thicken up quickly, allowing it to be spread easily without being too liquid. Using fresh raspberries will result in a much runnier jello layer that may leak through the cheesecake filling.
Why is my dessert called a “Lush”?
The term “Lush” is often used for layered, no-bake desserts that are rich, creamy, and “lush-ious.” They typically feature a cookie or cracker crust, a cream cheese layer, a pudding or fruit layer, and a whipped topping. They’re a classic American potluck dessert!
Can I make this in a different-sized pan?
You can, but you’ll need to adjust your expectations. A smaller 8×8 or 9×9 inch pan will result in much thicker layers, and you may have some leftover filling. A round springform pan could also work for a dessert that looks more like a traditional cheesecake, but be extra careful to seal the edges to prevent leaks.
Hungry for more? Follow us on Pinterest for daily recipes!
Final Thoughts
This Raspberry Cheesecake Lush is more than just a dessert; it’s an experience. It’s the perfect combination of sweet, tart, creamy, and crunchy. Whether you’re bringing it to a summer cookout, a holiday gathering, or just making a special weeknight treat for your family, this recipe is a guaranteed hit. It’s easy, impressive, and outrageously delicious. Enjoy every single bite!
Print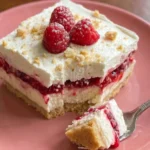
Easy No-Bake Raspberry Cheesecake Lush (Layered Dessert)
- Total Time: 505 minutes
- Yield: 18 servings 1x
- Diet: N/A
Description
A layered no-bake dessert featuring a Golden Oreo crust, a creamy lemon cheesecake filling, a vibrant raspberry gelatin layer, and a light whipped topping.
Ingredients
27 whole Golden Oreos
7 tablespoons salted butter (melted)
8 ounces cream cheese (softened)
1 cup powdered sugar
1 tablespoon lemon zest
1 tablespoon fresh lemon juice
1 tub (8 oz) Cool Whip (thawed)
1 box (3 oz) raspberry gelatin
1 cup boiling water
2 cups frozen raspberries
1 tub (8 oz) Cool Whip (thawed)
Instructions
- Step 1: To make the crust, place the Golden Oreos in a food processor and process at high speed into fine crumbs.
- Step 2: Reduce the processor speed to low, slowly add the melted butter, and process until the crumbs clump together.
- Step 3: Press the crumb mixture firmly into a 9×13 baking pan and place it in the freezer for 20 minutes.
- Step 4: For the cheesecake layer, add the cream cheese, powdered sugar, lemon zest, and lemon juice to a large mixing bowl.
- Step 5: Use an electric hand mixer to beat the cheesecake ingredients together until smooth and free of lumps.
- Step 6: Add one tub (8 oz) of thawed Cool Whip to the cheesecake mixture and beat on low speed until just combined.
- Step 7: Spread the cheesecake mixture evenly over the frozen crust, ensuring it is spread tightly against the sides of the pan.
- Step 8: To make the Jello layer, add the raspberry gelatin powder to a mixing bowl with the boiling water. Whisk until the gelatin is completely dissolved.
- Step 9: Stir the frozen raspberries into the gelatin mixture. It will start to thicken quickly.
- Step 10: Working quickly, gently pour the raspberry gelatin mixture over the cheesecake layer and spread the raspberries out as evenly as possible.
- Step 11: Spread the remaining tub (8 oz) of thawed Cool Whip over the raspberry layer.
- Step 12: Cover the dish with plastic wrap or a lid and refrigerate for at least 8 hours, or overnight.
- Step 13: When ready to serve, cut into slices and garnish with extra cookie crumbs or fresh raspberries if desired.
Notes
Spreading the cheesecake layer tightly against the sides of the pan helps prevent the Jello layer from leaking down.
The Jello layer will thicken very quickly once the frozen raspberries are added. Be prepared to work fast to spread it.
For the best set, refrigerate the dessert for at least 8 hours, or overnight.
Serve the dessert chilled directly from the fridge.
- Prep Time: 25 minutes
- Cook Time: 0 minutes
- Category: Dessert
- Method: No-Bake
- Cuisine: American