
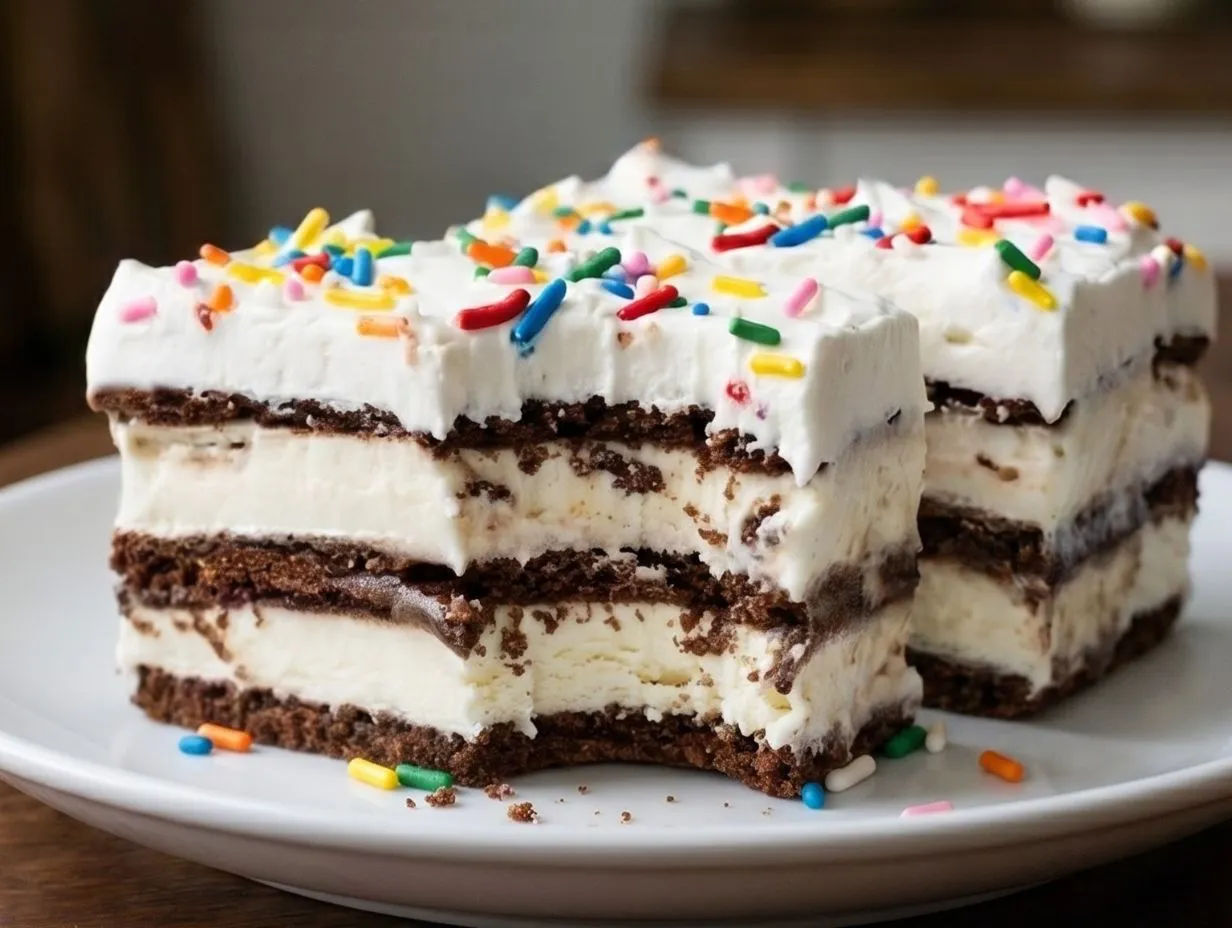
There are some recipes that just scream “summer,” and this Ice Cream Sandwich Cake is at the very top of that list. It brings back all the nostalgic joy of chasing down the ice cream truck, but transforms those simple treats into a show-stopping dessert. With just a few store-bought ingredients and about 15 minutes of prep, you can assemble a layered masterpiece of ice cream, chocolate, and caramel that will have everyone at your next BBQ or potluck asking for the recipe. It’s the ultimate shortcut to dessert hero status!
This cake is all about maximum impact with minimal effort. It’s a frozen, layered delight that’s perfect for birthday parties, family gatherings, or just a special weeknight treat when it’s too hot to turn on the oven. If you’re a fan of easy, no-bake desserts that still look impressive, you’ll also fall in love with our No-Bake Chocolate Lasagna Recipe.
Table of Contents
Content List
Why make this recipe
There are so many reasons to love this simple yet decadent dessert! Here’s why it should be your new go-to:
- No-Bake Brilliance: Keep your kitchen cool! This entire recipe is assembled and then frozen, making it the perfect dessert for hot summer days.
- Incredibly Easy: With only 5 simple ingredients and no complicated steps, anyone can make this cake. It’s a fantastic recipe to get kids involved in the kitchen.
- Crowd-Pleasing Favorite: The combination of ice cream, chocolate, and caramel is a guaranteed hit with both kids and adults. It’s a familiar, comforting flavor profile in a fun new form.
- Make-Ahead Magic: You can prepare this cake a day or two in advance, making party prep a total breeze. Just pull it out of the freezer when you’re ready to serve.
- Endlessly Customizable: Feel free to get creative! Swap out the sauces, use different flavored ice cream sandwiches, or add your favorite candy toppings.
Ingredients
- 9 whole frozen ice cream sandwiches,unwrapped
- 1 cup caramel sauce
- 1 cup chocolate sauce
- 8 ounces whipped topping
- rainbow sprinkles
How to make Ice Cream Sandwich Cake
Step 1: Start by creating your base. Place 3 of the unwrapped ice cream sandwiches side-by-side on a freezer-safe plate or a small platter. This will form the first layer of your cake.
Step 2: Drizzle a generous amount of caramel sauce over the first layer of ice cream sandwiches, spreading it out to cover the tops. Follow that by drizzling the chocolate sauce over the caramel.
Step 3: Carefully place another 3 ice cream sandwiches on top of the sauces to create the second layer. Press down gently to make it compact.
Step 4: Repeat the process by spreading another layer of caramel sauce and chocolate sauce over the second layer of sandwiches.
Step 5: Place the final 3 ice cream sandwiches on top. Now, cover the entire cake—top and sides—with the 8 ounces of whipped topping, using a spatula to smooth it out like you’re frosting a regular cake.
Step 6: If you’re using them, decorate the top of the cake with a fun shower of rainbow sprinkles. Carefully place the finished cake in the freezer.
Step 7: Freeze the cake for at least 3 hours, or until it is completely firm. This is key for getting clean slices. When ready to serve, remove it from the freezer, slice, and enjoy immediately!
How to serve Ice Cream Sandwich Cake

Serving this cake is as easy as making it! For the cleanest cuts, run a large, sharp knife under hot water for a few seconds, wipe it dry, and then slice. Serve the slices immediately on chilled plates. For an extra touch of indulgence, you can have extra chocolate and caramel sauce on the side for drizzling, or even add a dollop of fresh whipped cream.
How to store Ice Cream Sandwich Cake
Leftovers? No problem! This cake stores beautifully in the freezer. Wrap the remaining cake tightly in a layer of plastic wrap, followed by a layer of aluminum foil to prevent freezer burn. It will keep well in the freezer for up to one week. When you’re ready for another slice, you can enjoy it straight from the freezer.
Tips to make Ice Cream Sandwich Cake
Follow these simple tips to ensure your Ice Cream Sandwich Cake turns out perfectly every time.
- Work Fast: Your main challenge is melting ice cream! Have all your ingredients unwrapped and ready to go before you start assembling so the sandwiches stay as frozen as possible.
- Choose Your Pan Wisely: While a plate works, assembling the cake in a standard loaf pan lined with plastic wrap makes it even easier. You can use the plastic wrap to lift the cake out for frosting and slicing.
- Freeze Fully: Don’t rush the freezing time. A fully frozen cake is much easier to slice neatly. Three to four hours is the minimum, but overnight is even better.
- Get Creative with Flavors: This recipe is a fantastic template. Try using Neapolitan or cookies ‘n’ cream sandwiches. Swap the caramel for butterscotch or strawberry sauce. For toppings, consider crushed Oreo cookies, chopped nuts, toffee bits, or mini chocolate chips. It has the same fun, customizable spirit as our No Bake Icebox Cake Recipe a sweet summer delight.
FAQs About Ice Cream Sandwich Cake
Can I make this cake ahead of time?
Absolutely! This is a perfect make-ahead dessert. You can assemble and freeze it up to 2 days in advance. Just keep it well-covered in the freezer until you’re ready to serve.
What kind of whipped topping is best?
A frozen whipped topping (like Cool Whip) that has been thawed is ideal for this recipe. It’s more stable than fresh whipped cream and holds its shape much better after being frozen and thawed slightly for serving.
My cake is hard to slice. What can I do?
For easy, clean slices, let the cake sit at room temperature for about 5 minutes before cutting. Also, use a large, sharp knife dipped in hot water and wiped dry between each cut. This will melt the ice cream just enough for the knife to glide through.
Final Thoughts
This Ice Cream Sandwich Cake is the definition of a simple pleasure. It’s a fun, festive, and ridiculously easy dessert that delivers pure happiness with every bite. Whether you’re celebrating a special occasion or just looking for a cool treat to beat the heat, this recipe is a must-try. It’s a reminder that sometimes, the most memorable dishes are the ones that are the most fun to make and eat!
Hungry for more? Follow us on Pinterest for daily recipes!
Print
Easy No-Bake Ice Cream Sandwich Cake | 15-Min Prep
- Total Time: 3 hours 15 minutes
- Yield: 10 servings 1x
- Diet: Vegetarian
Description
A quick and easy no-bake dessert made by layering ice cream sandwiches with caramel and chocolate sauce, topped with whipped cream and sprinkles.
Ingredients
9 whole frozen ice cream sandwiches, unwrapped
1 cup caramel sauce
1 cup chocolate sauce
8 ounces whipped topping
rainbow sprinkles
Instructions
- On a plate or small serving platter, arrange 3 unwrapped ice cream sandwiches side-by-side to form the base layer.
- Spread half of the caramel sauce evenly over the sandwiches, followed by half of the chocolate sauce.
- Place another 3 ice cream sandwiches on top to create the second layer.
- Spread the remaining caramel sauce and chocolate sauce over the second layer of sandwiches.
- Add the final 3 ice cream sandwiches to form the top layer.
- Frost the top and sides of the entire cake with the whipped topping until fully covered.
- Garnish with rainbow sprinkles, if desired.
- Place the cake in the freezer for at least 3 hours, or until it is firm enough to slice cleanly.
- When ready to serve, remove from the freezer, slice, and enjoy immediately.
Notes
For extra indulgence, you can drizzle individual slices with more caramel or chocolate sauce before serving.
Ensure the cake is frozen solid before slicing for the best results and cleanest cuts.
- Prep Time: 15 minutes
- Cook Time: 3 hours
- Category: Dessert
- Method: No-Bake
- Cuisine: American