
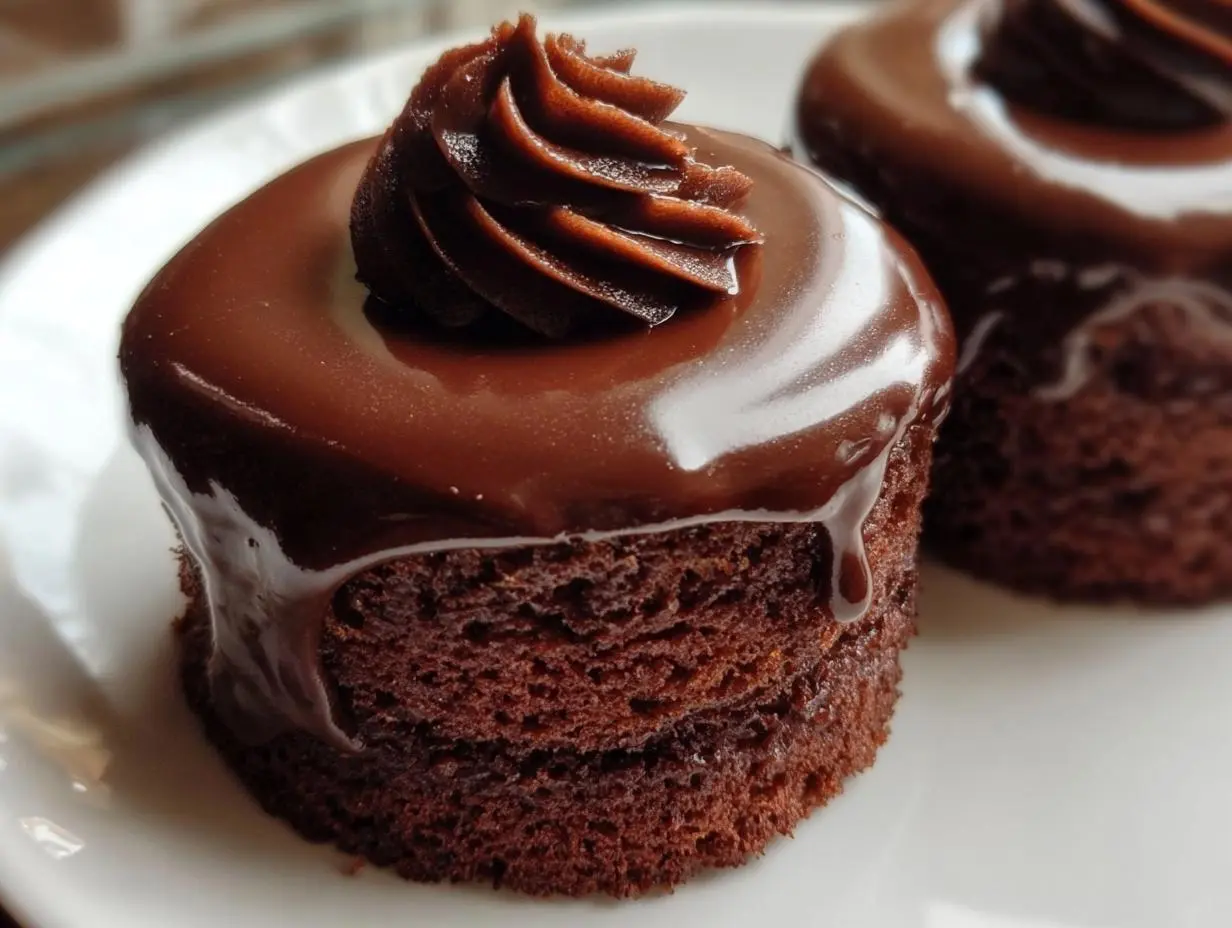
There’s something undeniably special about a personal-sized dessert. It feels elegant, thoughtful, and completely indulgent. These Mini Chocolate Ganache Cakes are the epitome of that feeling. Imagine a triple-threat of chocolate: a super moist, deep chocolate cake, a rich and creamy fudge frosting filling, and a glossy, decadent ganache coating that drapes over every curve. They are the perfect little bites of chocolate heaven, ideal for everything from a fancy dinner party to a special Tuesday night treat.
Why make this recipe
If you’re looking for a dessert that truly wows, this is it. Here’s why you’ll fall in love with these little cakes:
- Perfectly Portioned: Individual servings make them easy to serve at parties and gatherings. No messy cake cutting required!
- Triple Chocolate Decadence: With a moist chocolate cake, a rich fudge frosting, and a silky ganache, this recipe is a dream come true for any chocolate lover.
- Elegant Presentation: The glossy ganache and piped frosting make these mini cakes look like they came straight from a high-end bakery.
- Surprisingly Simple: While they look impressive, the steps are straightforward and manageable for any home baker ready for a fun project.
Ingredients
For the chocolate cake
- 1 and ½ cups Unsweetened Cocoa Powder
- 1 and ½ tsp. Salt
- 3 cups All-Purpose Flour
- 3 cups Sugar
- 1 TBS Baking Soda
- 1 and ½ tsp. Baking Powder
- 1 and ½ cups Vegetable Oil
- 1 and ½ cups Buttermilk
- 1 and ½ tsp. Vanilla Extract
- 3 Large Eggs, lightly beaten
- 1 and ½ cups Hot Water
For the chocolate fudge frosting
- 4 oz. Unsweetened Chocolate, chopped
- 1 stick Unsalted Butter
- 16 oz. Powdered Sugar
- ½ cup Milk
- 2 tsp. Vanilla Extract
For the chocolate ganache
- 16 oz. Bitter-Sweet Chocolate, chopped
- 2 cups Heavy Cream
How to make Mini Chocolate Ganache Cakes
Let’s break down this showstopper dessert into simple, manageable steps. Grab your apron and get ready to create some chocolate magic!
Step 1: Prepare the Pans and Dry Ingredients. First things first, preheat your oven to 350°F. Thoroughly grease two 9-inch round cake pans. For extra insurance against sticking, line the bottoms with parchment paper and then grease the paper as well. In a large bowl, sift together the cocoa powder, flour, baking soda, baking powder, salt, and sugar. Sifting helps to aerate the ingredients and get rid of any lumps for a smoother cake.
Step 2: Mix the Cake Batter. Using a hand-held mixer on low speed, beat the wet ingredients into your dry mixture one at a time. Add the oil, buttermilk, vanilla, and lightly beaten eggs. Finally, carefully pour in the hot water. Mix everything together until the batter is smooth and well-combined, which should take about 2 minutes. Don’t overmix!
Step 3: Bake and Cool the Cakes. Evenly divide the batter between your two prepared pans. Bake for 45 to 55 minutes. You’ll know they’re done when a toothpick inserted into the center of each cake comes out clean. Let the cakes cool in their pans for about 30 minutes before carefully flipping them out onto wire racks to cool completely.
Step 4: Create the Mini Cake Rounds. Once the cakes are fully cooled, use a serrated knife to level the tops if they’ve domed. Then, carefully slice each cake in half horizontally, giving you four even layers. Using a 2-inch round biscuit or cookie cutter, cut out as many rounds as you can from each layer—you should get about 8 per layer for a total of 32 rounds. Don’t throw away the scraps! They’re perfect for making cake pops or a trifle later. Finally, slice each of these mini rounds in half horizontally, so you have a total of 64 thin cake disks.
Step 5: Make the Fudge Frosting. In a small saucepan over low heat, gently melt the unsweetened chocolate and butter together, stirring until smooth. In a separate bowl, whisk together the powdered sugar, milk, and vanilla. Pour the melted chocolate mixture into the sugar mixture and stir to combine. To get that perfect, pipeable consistency, place this bowl inside a larger bowl filled with ice water. Stir the frosting with a wooden spoon until it cools, thickens, and becomes smooth and spreadable.
Step 6: Whip Up the Ganache. Place your chopped bitter-sweet chocolate into a medium-sized, heatproof bowl. In a small saucepan, bring the heavy cream to a boil. As soon as it boils, pour the hot cream directly over the chopped chocolate. Let it sit, untouched, for one minute to allow the heat to melt the chocolate. Then, slowly and gently stir the mixture until it transforms into a smooth, glossy, and shiny ganache. This should take about 2 to 3 minutes. If you’re using it, stir in the rum. Set the ganache aside to cool for about 20 minutes; you want it pourable but not piping hot.
Step 7: Assemble the Mini Cakes. It’s time to build your masterpieces! Take one of the small cake disks and spread or pipe a small amount of the fudge frosting on top. Place another cake disk on top to create a lovely little two-layer mini cake. Repeat this process until all your cake disks are used up.
Step 8: Coat with Ganache and Decorate. Place your assembled mini cakes on a wire rack with a sheet of parchment paper underneath to catch any drips. Carefully pour about 2 to 3 tablespoons of the slightly cooled ganache over the top of each cake. Nudge it with an off-set spatula to encourage it to flow down and cover the sides completely. Once all the cakes are coated, place them in the refrigerator for about 30 minutes to allow the ganache to set. Transfer the remaining fudge frosting to a piping bag fitted with a star tip (or your favorite tip) and pipe a beautiful swirl on top of each set cake.
How to serve Mini Chocolate Ganache Cakes

These little beauties are designed to be the star of the show. Arrange them on a tiered platter or a simple white cake stand for a stunning presentation at your next party. They are perfectly rich on their own but also pair wonderfully with a dollop of fresh whipped cream or a few fresh raspberries on the side to cut through the richness. For a cozy treat, enjoy one with a hot cup of coffee, a cold glass of milk, or even a small glass of the rum you used in the ganache!
How to store Mini Chocolate Ganache Cakes
Due to the dairy in the frosting and ganache, these cakes should be stored in the refrigerator. Place them in an airtight container to keep them from drying out and to protect them from any other fridge odors. They will stay fresh and delicious for up to 4 days.
If you want to store them for longer, they also freeze well! Place the finished cakes on a baking sheet and freeze until solid, about 1-2 hours. Then, wrap each cake individually in plastic wrap and place them in a freezer-safe bag or container. They can be frozen for up to 2 months. To thaw, simply unwrap and let them sit at room temperature for a couple of hours.
Tips to make
- Room Temperature Ingredients: For the best cake texture, make sure your eggs and buttermilk are at room temperature before you begin. This helps them incorporate into the batter more smoothly.
- Don’t Skip the Sifting: Sifting the dry ingredients, especially the cocoa powder, is crucial for a lump-free, tender cake crumb.
- The Ice Bath is Key: Don’t skip the ice water bath for the fudge frosting. It’s the secret to quickly chilling the frosting to the perfect thick, yet spreadable, consistency for filling and piping.
- Ganache Temperature Matters: Let the ganache cool for the recommended 20 minutes. If it’s too hot, it will be too thin and won’t cling to the cakes properly. If it gets too cold and thick, you can gently warm it for a few seconds in the microwave.
- Easy Cleanup: Placing the wire rack over a sheet of parchment paper or a baking sheet before pouring the ganache will save you a massive cleanup headache. You can even scoop up the dripped ganache and reuse it!
FAQs About Mini Chocolate Ganache Cakes
Can I make these cakes ahead of time?
Absolutely! You can bake the cake layers a day in advance, let them cool completely, and wrap them well in plastic wrap at room temperature. You can also fully assemble and decorate the cakes and store them in an airtight container in the refrigerator for up to 24 hours before serving.
Is the rum in the ganache necessary?
Not at all! The rum is completely optional and just adds a little warmth and depth of flavor. If you prefer to leave it out, you can omit it entirely or replace it with 1 teaspoon of vanilla extract or even a teaspoon of strong brewed coffee or espresso powder to enhance the chocolate flavor.
What should I do with the leftover cake scraps from cutting the rounds?
Don’t let them go to waste! The recipe creator had the right idea. The scraps are perfect for making a delicious trifle by layering them with pudding, whipped cream, and fruit. You can also crumble them up and mix them with a little frosting to create the filling for decadent cake pops or cake truffles.
Hungry for more? Follow us on Pinterest for daily recipes!
Final Thoughts
These Mini Chocolate Ganache Cakes are more than just a dessert; they’re an experience. Each bite is a journey through layers of intense chocolate flavor and delightful textures. While they take a little time and love to assemble, the spectacular result is worth every single step. They are the perfect way to make any occasion feel a little more special and a lot more delicious. So go ahead, treat yourself and your loved ones to these incredible little cakes!
Print
Decadent Mini Chocolate Ganache Cakes Recipe
- Total Time: 2 hours 50 minutes
- Yield: 32 mini cakes 1x
- Diet: Vegetarian
Description
Decadent mini chocolate cakes layered with fudge frosting and covered in a rich chocolate ganache, perfect for individual servings.
Ingredients
For the chocolate cake:
1 and ½ cups (128 g) Unsweetened Cocoa Powder
1 and ½ tsp. Salt
3 cups (375 g) All-Purpose Flour
3 cups (600 g) Sugar
1 TBS Baking Soda
1 and ½ tsp. Baking Powder
1 and ½ cups Vegetable Oil
1 and ½ cups Buttermilk
1 and ½ tsp. Vanilla Extract
3 Large Eggs, lightly beaten
1 and ½ cups Hot Water
For the chocolate fudge frosting:
4 oz. (114 g) Unsweetened Chocolate, chopped
1 stick (112 g) Unsalted Butter
16 oz. Powdered Sugar
½ cup Milk
2 tsp. Vanilla Extract
For the chocolate ganache:
16 oz. Bitter-Sweet Chocolate, chopped
2 cups Heavy Cream
Instructions
- Step 1: Preheat the oven to 350 degrees F. Grease two 9-inch round cake pans, line with parchment paper, and then grease the paper.
- Step 2: In a large bowl, sift together the cocoa powder, flour, baking soda, baking powder, salt, and sugar.
- Step 3: Using a hand-held mixer, beat in the oil, buttermilk, vanilla, eggs, and hot water one at a time until the batter is smooth, about 2 minutes.
- Step 4: Pour the batter evenly into the prepared pans and bake for 45 to 55 minutes, or until a toothpick inserted into the centers comes out clean.
- Step 5: Let cakes cool in the pans for 30 minutes, then invert them onto wire racks to cool completely.
- Step 6: Once cooled, level each cake and then cut each cake in half horizontally, creating four equal layers.
- Step 7: Using a 2-inch round cutter, cut out approximately 8 rounds from each cake layer. Then, cut each of these mini cake rounds in half horizontally to create thin disks.
- Step 8: To make the frosting, melt the butter and unsweetened chocolate in a saucepan over low heat.
- Step 9: In a separate bowl, mix the powdered sugar, milk, and vanilla until smooth. Pour in the melted chocolate mixture.
- Step 10: Place the frosting bowl into a larger bowl filled with ice water. Stir with a wooden spoon until the frosting is smooth, thicker, and has a good spreading consistency.
- Step 11: To make the ganache, place the chopped bitter-sweet chocolate in a medium bowl. Bring the heavy cream to a boil in a saucepan.
- Step 12: Pour the hot cream over the chocolate and let it sit for 1 minute. Slowly stir until the mixture is smooth and shiny, about 2 to 3 minutes. Stir in the rum, if using, and set aside to cool for 20 minutes.
- Step 13: To assemble, spread or pipe some fudge frosting on one cake disk and top with another disk to create a mini two-layered cake. Repeat for all cake disks.
- Step 14: Place the assembled mini cakes on a wire rack set over parchment paper. Pour 2 to 3 tablespoons of ganache over each cake, ensuring the top and sides are fully covered.
- Step 15: Place the cakes in the refrigerator for about 30 minutes to allow the ganache to set.
- Step 16: Transfer the remaining fudge frosting to a piping bag fitted with a star tip and pipe a design on top of each chilled cake.
Notes
Wrap up and freeze leftover cake scraps to use in a trifle or cake pops.
An offset spatula can be helpful to spread the ganache evenly over the cakes.
Special equipment needed: Hand-held mixer, two 9-inch round cake pans, 2-inch biscuit cutter, off-set spatula, piping bag, and a star tip.
- Prep Time: 45 minutes
- Cook Time: 55 minutes
- Category: Dessert
- Method: Baking
- Cuisine: American