
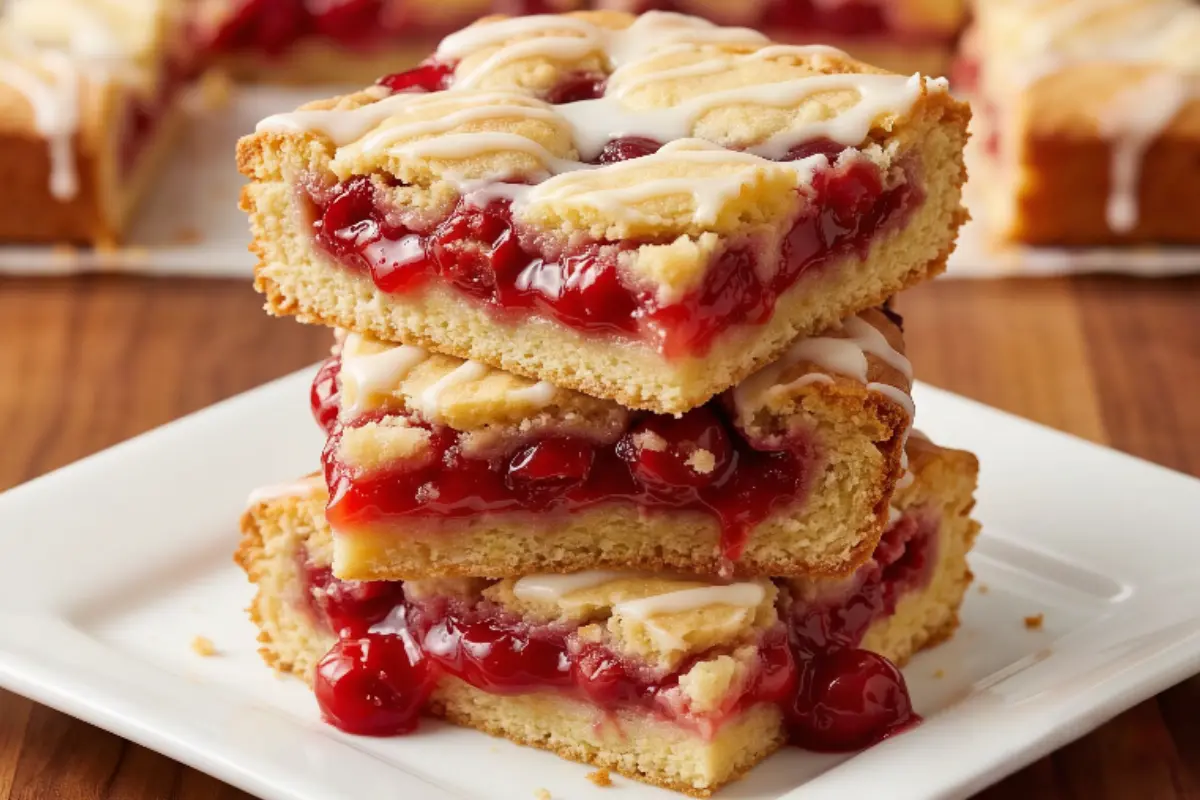
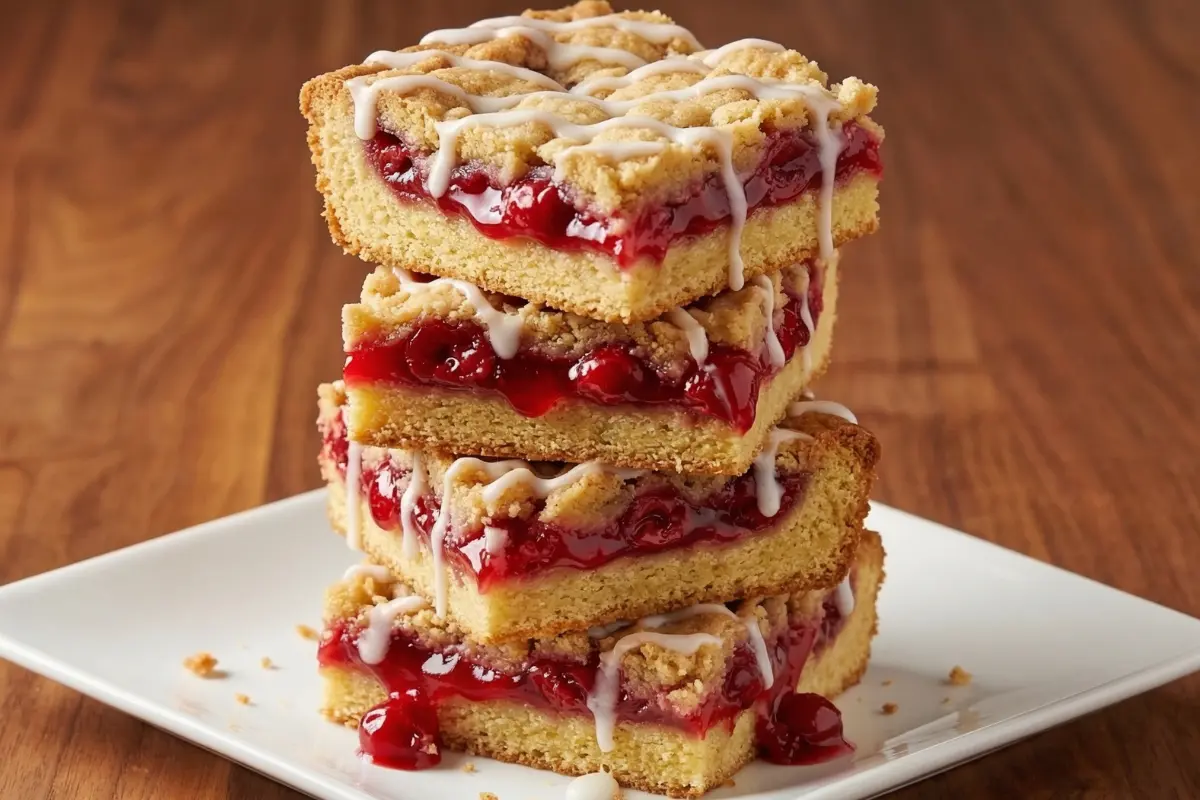
Cherry pie bars are the perfect dessert when you want all the comforting flavors of a classic cherry pie without the extra effort of making a traditional crust. These delicious bars combine a soft and delicate buttery crust with a vibrant cherry filling that delivers sweet, juicy flavor in every bite. Cherry pie bars are not only beautiful but also incredibly simple to prepare, making them perfect for family gatherings, holidays, or casual weeknight desserts. With their bright color and irresistible taste, they are sure to impress guests and satisfy any sweet tooth. Best of all, the recipe uses simple pantry ingredients and your favorite pie filling.
Why You’ll Love This Cherry Pie Bars Recipe
These cherry pie bars are a favorite among home bakers for many reasons. First, they give you the comforting taste of classic cherry pie but in a much easier form. There is no need to prepare a traditional pie crust or worry about shaping a lattice top.
Another reason to love this recipe is its versatility. You can easily replace the cherry pie filling with blueberry, apple, peach, or raspberry filling. This allows you to create different versions of the same dessert depending on what you have available.
The texture is one of the highlights of this recipe. The buttery crust is soft and delicate, while the cherry filling provides a burst of sweet, juicy flavor that balances the richness of the dough. A light drizzle of glaze on top adds the perfect finishing touch.
These bars are also great for serving a crowd. Because they are baked in a large pan and cut into squares, they are easy to slice, transport, and share at gatherings, potlucks, or holiday celebrations.
Finally, cherry pie bars look just as good as they taste. The deep red cherries and sweet glaze create a dessert that looks impressive without requiring complicated baking techniques.
Ingredients
For the bars
1 cup unsalted butter softened to room temperature
2 cups sugar
1 teaspoon salt
4 large eggs
1 teaspoon vanilla extract
1 quarter teaspoon almond extract
3 cups all purpose flour
2 cans cherry pie filling 21 ounces each
For the glaze
1 cup powdered sugar
1 half teaspoon vanilla extract
1 half teaspoon almond extract
2 to 3 tablespoons milk
Step by Step How to Make Cherry Pie Bars
Step 1
Preheat your oven to 350°F. Lightly grease a 15 x 10 x 1 inch baking pan to prevent sticking and make the bars easier to remove after baking.
Step 2
In a large mixing bowl, cream together the softened butter, sugar, and salt until the mixture becomes light and fluffy. This process usually takes about three to four minutes with an electric mixer.
Step 3
Add the eggs one at a time, mixing well after each addition to ensure the batter stays smooth and well combined.
Step 4
Mix in the vanilla extract and almond extract. These ingredients enhance the overall flavor and complement the cherry filling beautifully.
Step 5
Gradually add the flour to the batter, mixing until everything is fully combined. The dough will be thick and slightly sticky.
Step 6
Spread about three cups of the dough evenly into the prepared baking pan to create the base layer.
Step 7
Spread the cherry pie filling evenly over the dough, making sure it reaches the edges of the pan.
Step 8
Drop the remaining dough by teaspoonfuls across the cherry filling. The filling should still be visible between the small portions of dough.
Step 9
Bake the bars for 30 to 35 minutes or until the top becomes lightly golden brown.
Step 10
Allow the bars to cool completely in the pan on a wire rack before adding the glaze.
Step 11
In a small bowl, whisk together the powdered sugar, vanilla extract, almond extract, and milk until smooth and pourable. Drizzle the glaze over the cooled bars.
Step 12
Cut into squares and serve.
Helpful Tips
Use room temperature butter so it blends easily with the sugar and creates a smoother batter.
Allow the bars to cool completely before adding the glaze so it sets nicely on top.
Lining the baking pan with parchment paper can help you lift the bars out easily and create cleaner slices.
Avoid overmixing the batter after adding the flour, as this can make the bars dense instead of soft.
For neat slices, chill the bars in the refrigerator for about thirty minutes before cutting.
Substitutions And Variations
This recipe is very flexible and can be customized in several ways.
You can substitute cherry pie filling with blueberry, strawberry, raspberry, or peach pie filling.
For a brighter flavor, add a small amount of lemon zest to the batter. The citrus flavor pairs beautifully with cherries.
If you enjoy a slightly nutty taste, sprinkle sliced almonds on top of the dough before baking.
White chocolate chips can also be mixed into the dough for an extra touch of sweetness and texture.
For a lighter glaze, add a small squeeze of fresh lemon juice to the powdered sugar mixture.
Storage Instructions
Cherry pie bars store very well, making them a convenient dessert to prepare ahead of time.
Room temperature
Store the bars in an airtight container for up to two days.
Refrigerator
Place the bars in a sealed container and refrigerate for up to five days. This helps maintain freshness and keeps the glaze firm.
Freezer
Cherry pie bars can be frozen for up to three months. Wrap each piece in plastic wrap and store them in a freezer safe container. Thaw overnight in the refrigerator before serving.
Nutritional Information
Approximate values per serving
Calories 556 kcal
Carbohydrates 82 g
Fat 24 g
Protein 6 g
Sugar 55 g
Sodium 180 mg
The exact nutritional values may vary depending on the brands of ingredients used.
Serving Suggestions
Cherry pie bars are wonderful on their own, but you can easily elevate them for a more special dessert experience.
Enjoy them slightly warm paired with a scoop of vanilla ice cream for a timeless and delicious dessert.
Add a spoonful of whipped cream and a few fresh cherries for a beautiful presentation.
Serve them with coffee or tea during brunch or afternoon gatherings.
They also make a fantastic addition to holiday dessert tables since they are easy to slice and serve.
For a bakery style look, lightly dust the bars with powdered sugar before serving.
Frequently Asked Questions About Cherry Pie Bars
Can I use homemade cherry pie filling?
Yes, homemade cherry pie filling works perfectly in this recipe and can provide even better flavor. Just make sure the filling is thick so the bars hold their shape when sliced.
Can I make cherry pie bars ahead of time?
Yes, these bars can be prepared a day in advance. In fact, many people find they taste even better the next day because the flavors have had time to develop.
Can I double the recipe?
Yes, you can double the ingredients and bake the bars in a larger sheet pan if you are serving a large group.
Do cherry pie bars need refrigeration?
They can be stored at room temperature for a short time, but refrigeration will keep them fresh longer and help maintain their texture.
Can I freeze cherry pie bars?
Yes, cherry pie bars freeze very well. Wrap them tightly and store them in the freezer for up to three months. Thaw them overnight in the refrigerator before serving.
Final Thoughts
Thank you so much for taking the time to explore this cherry pie bars recipe. It is one of my favorite desserts because it delivers the comforting flavor of cherry pie in such a simple and approachable way. The soft buttery crust, sweet cherry filling, and delicate glaze come together to create a dessert that is both easy to make and full of flavor. I hope you enjoy baking and sharing these delicious bars with your family and friends. Wishing you many happy moments in the kitchen and thank you for being part of this wonderful community of food lovers.
Print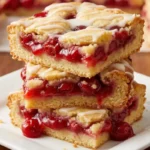
Cherry Pie Bars
- Total Time: 55 minutes
- Yield: 12 servings 1x
- Diet: Vegetarian
Description
Cherry Pie Bars are buttery dessert bars layered with sweet cherry pie filling and finished with a light vanilla almond glaze. This easy homemade dessert delivers the classic flavor of cherry pie without the work of making a traditional crust. Perfect for holidays, potlucks, and family gatherings, these soft and tender bars slice beautifully and are always a crowd favorite.
Ingredients
For the Bars
1 cup unsalted butter softened
2 cups granulated sugar
1 teaspoon salt
4 large eggs
1 teaspoon vanilla extract
¼ teaspoon almond extract
3 cups all purpose flour
2 cans cherry pie filling 21 ounces each
For the Glaze
1 cup powdered sugar
½ teaspoon vanilla extract
½ teaspoon almond extract
2 to 3 tablespoons milk
Instructions
- Preheat oven to 350°F and grease a 15 x 10 x 1 inch baking pan.
- In a large mixing bowl, cream together the butter, sugar, and salt until light and fluffy.
- Add the eggs one at a time, mixing well after each addition.
- Stir in the vanilla extract and almond extract.
- Gradually mix in the flour until a thick dough forms.
- Spread about 3 cups of the dough evenly into the prepared baking pan.
- Spread the cherry pie filling evenly over the dough layer.
- Drop the remaining dough by teaspoonfuls across the cherry filling.
- Bake for 30 to 35 minutes or until the top is lightly golden.
- Allow the bars to cool completely in the pan.
- In a small bowl, whisk together powdered sugar, vanilla extract, almond extract, and milk until smooth.
- Drizzle the glaze over the cooled bars, slice into squares, and serve.
Notes
Use room temperature butter for easier mixing and a smoother batter.
Allow the bars to cool fully before adding the glaze so it sets properly.
Line the pan with parchment paper for easier removal and cleaner slices.
You can substitute cherry pie filling with blueberry, raspberry, or apple filling for different variations.
- Prep Time: 25 minutes
- Cook Time: 30 minutes
- Category: Dessert
- Method: Baking
- Cuisine: American