
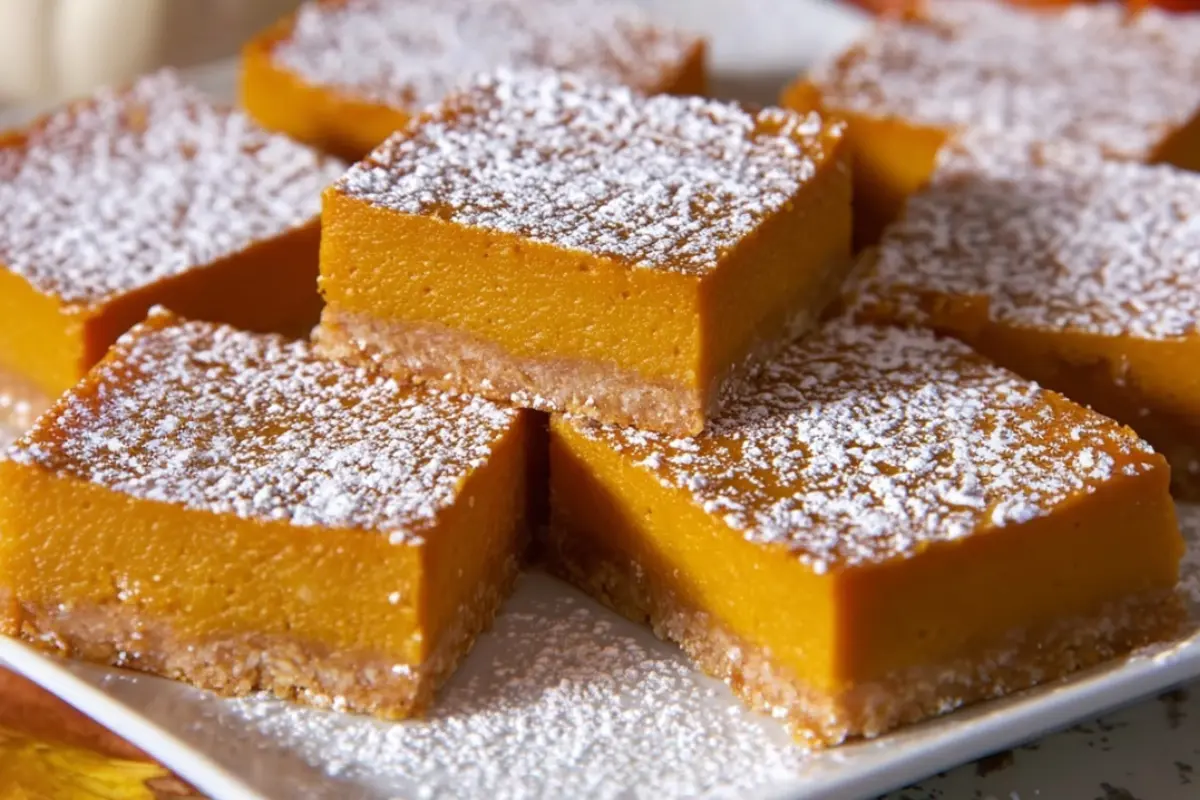
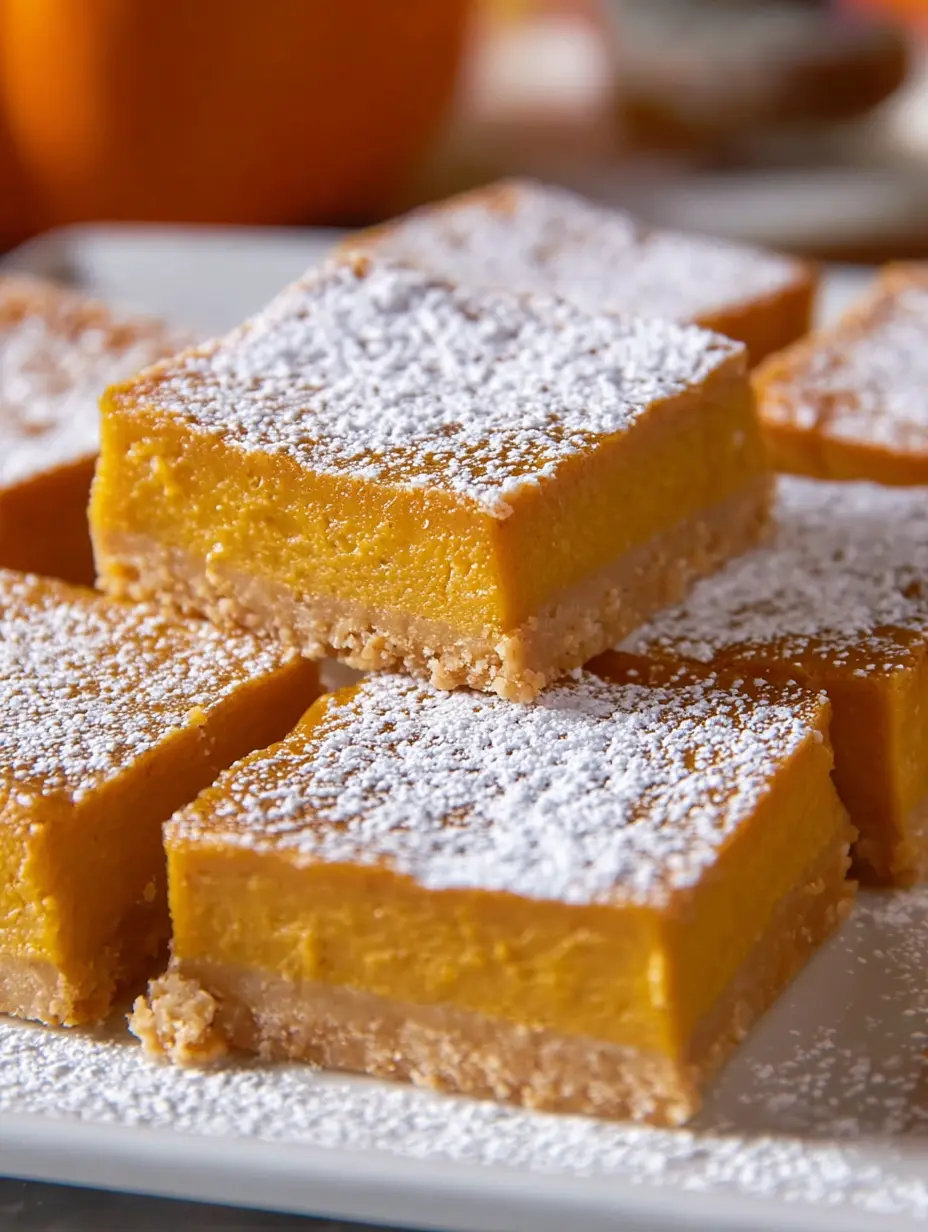
Pumpkin Dream Bars are the kind of dessert that brings together creamy pumpkin spice flavor with a crunchy cereal-based crust. If you’re craving something festive, slightly indulgent yet still fun to make, this bar recipe hits the spot. The crust uses crushed cereal, and the filling is custard-like, making it feel like a mash-up of pumpkin pie and cheesecake. With that smooth pumpkin filling paired with a slightly crunchy base, you’re going to love how this turned out.
Why You’ll Love Pumpkin Dream Bars
You’ll love Pumpkin Dream Bars because they strike the perfect balance between comfort dessert and something a little different. The crust made from crushed gluten-free cereal (such as Gluten Free Honey Nut Cheerios) gives you an easy, no-fuss base that’s crispy and fun. The filling, made with pumpkin puree, evaporated milk, eggs, and warm spices (cinnamon, ginger) delivers that rich pumpkin pie flavor, but in bar form. Since they’re baked and then chilled, you get a great texture contrast and a dessert that’s easy to slice and serve. Plus, the fact that they’re labeled gluten-free (when you use the specified cereal) means they’re friendly for more dietary needs.
Ingredients
Crust
- Cooking spray, for pan
- 2 ½ cups Gluten Free Honey Nut Cheerios cereal
- 3 Tbsp granulated sugar
- 1/3 cup butter, melted
- Pinch of kosher salt
Filling
- 2 eggs
- ½ cup packed brown sugar
- 1 (15-oz) can pumpkin puree
- 1 (12-oz) can evaporated milk
- 1 tsp ground cinnamon
- ¼ tsp ground ginger
- 1 tsp pure vanilla extract
- ½ tsp kosher salt
- Powdered sugar, for dusting
Step-by-Step: How to Make Pumpkin Dream Bars
- Set your oven to 350°F (175°C) and lightly coat a 9″×9″ square baking dish with cooking spray.
- Crush the cereal: place the 2½ cups of Gluten Free Honey Nut Cheerios in a large resealable plastic bag and use a rolling pin (or food processor) to crush into fine crumbs.
- In a large bowl, combine the cereal crumbs, melted butter, granulated sugar, and pinch of salt. Stir until evenly mixed. Firmly press the mixture into the base of the prepared 9″×9″ pan to create an even crust layer.
- Bake the crust at 350°F for about 7-8 minutes, just until it begins to turn golden. Take it out of the oven and set it aside to cool as you move on to the filling.
- Raise the oven temperature to 425°F (about 220°C).
- To make the filling, use a hand mixer to blend the eggs and brown sugar in a large mixing bowl until well incorporated. Then add the pumpkin puree, evaporated milk, cinnamon, ginger, vanilla extract, and salt. Mix until smooth (note: the mixture will be quite loose).
- Pour the pumpkin filling over the cooled crust in the pan. Then bake it at 425°F for 15 minutes. After this 15-minute period, reduce the oven temperature to 350°F (about 175°C).
- Continue baking at 350°F for about 35 more minutes, or until a toothpick inserted in the center comes out clean. Take it out of the oven and let it cool completely at room temperature. Then refrigerate until chilled (this helps firm up the filling).
- Once chilled, sift powdered sugar over the top of the sliced squares before serving.
Helpful Tips
- Press the crust mixture firmly into the pan so you achieve a solid base that doesn’t fall apart when you slice.
- Because the filling is quite loose when poured in, don’t worry if it looks custardy—once baked and chilled it will set nicely.
- After the first 15 minutes at 425°F, lowering the temperature to 350°F ensures a gentle finish and helps avoid over-browning the crust.
- Chill the bars thoroughly before slicing to get clean, neat squares. Warm bars may crumble or lose shape.
- Sifting powdered sugar just before serving gives a nice visual touch and a sweet finish.
- Store leftovers covered in the refrigerator; the chilling step also helps extend their life.
Substitutions And Variations
- Crust alternative: If you don’t have Gluten Free Honey Nut Cheerios, you could use another gluten-free cereal or even gluten-free graham crackers or gluten-free cookies crushed into crumbs.
- Spice variation: If you like more pumpkin-pie flavour, you can add a pinch of nutmeg or all-spice in addition to the cinnamon and ginger.
- Sweetness adjustment: If you prefer slightly less sugar, you could reduce the brown sugar a little and supplement with a splash of maple syrup or honey (though this may affect texture slightly).
- Dairy-free version: While this specific recipe uses evaporated milk and butter, you might experiment with a dairy-free milk alternative (such as coconut milk) and vegan butter; keep in mind the texture may change somewhat and you may need to adjust bake time.
- Topping options: Instead of just powdered sugar, you could drizzle a thin glaze (powdered sugar + milk) or sprinkle chopped toasted nuts or pumpkin seeds for extra crunch.
Storage Instructions
Once baked and chilled, store the Pumpkin Dream Bars in an airtight container in the refrigerator. They stay best when covered and chilled. Bring them out a few minutes before serving for a slightly softer texture. If you want to make ahead, you can bake them, chill overnight, and then slice just before serving. They keep well for several days in the fridge, though for the best texture, consume within about 3-4 days.
Serving Suggestions
These bars are wonderful served chilled, straight from the fridge, with a cup of coffee or spiced latte. For a more indulgent dessert, pair a bar with a scoop of vanilla ice cream or a dollop of whipped cream and maybe a sprinkle of cinnamon on top. They’re also a great make-ahead dessert for autumn gatherings, holiday dinners, or when you want something special but easy to slice and serve.
Frequently Asked Questions About Pumpkin Dream Bars
Can I use a different size pan?
Yes—the recipe uses a 9″×9″ pan, which yields 12 bars. If you use a larger pan (e.g., 9″×13″), the bars will be thinner and may bake faster, so keep an eye on the bake time. If you use a smaller pan, the bars will be thicker and may need extra time.
Can I use fresh pumpkin instead of canned pumpkin puree?
You can, but you’ll want to ensure the pumpkin is cooked and pureed well (not pumpkin pie filling, which includes added ingredients). The recipe assumes the texture and moisture of canned pumpkin puree, so fresh pumpkin should be cooked, drained if needed, and pureed to match consistency.
My filling looked very loose when I poured it—is that normal?
Yes! The recipe notes that the filling “will be quite loose” when poured. It sets up during the bake and chilling phases, so don’t worry if it looks runny at first.
How do I know when the bars are done baking?
After the initial 15 minutes at 425°F and then 35 minutes at 350°F (or so), insert a toothpick in the center. It should come out clean (or with a few moist crumbs) but not wet batter. Cooling and chilling help further firm the bars.
Can I freeze these bars?
Yes, you can wrap cooled, un-sliced bars in foil or plastic wrap and freeze them. When ready to serve, thaw in the refrigerator overnight, slice, then dust with powdered sugar just before serving.
Final Thoughts
Thank you for joining me in making these Pumpkin Dream Bars. What a joy to share this recipe with you! I hope you find the process as satisfying as I did: crushing that cereal crust, whisking the pumpkin-spice filling, and waiting (impatiently!) for the chilling step. They’re easy to make, rich in seasonal flavor, and perfect for sharing. I genuinely enjoy how these bars come together to deliver that memorable pumpkin dessert experience—with less fuss than a pie. Enjoy every bite, and here’s to many delicious moments in your kitchen. Wishing you fun baking, warm treats, and happy eating.
Join us on Pinterest for new mouthwatering recipes every day!
Print
Pumpkin Dream Bars
- Total Time: 2 hours (includes chilling)
- Yield: 12 bars 1x
Description
Pumpkin Dream Bars are the perfect fall dessert—smooth, spiced pumpkin filling layered over a buttery gluten-free cereal crust. Chill before slicing for the perfect texture and serve dusted with powdered sugar.
Ingredients
Crust
Cooking spray, for pan
2 ½ cups Gluten Free Honey Nut Cheerios cereal
3 Tbsp granulated sugar
1/3 cup butter, melted
Pinch of kosher salt
Filling
2 eggs
½ cup packed brown sugar
1 (15-oz) can pumpkin puree
1 (12-oz) can evaporated milk
1 tsp ground cinnamon
¼ tsp ground ginger
1 tsp pure vanilla extract
½ tsp kosher salt
Powdered sugar, for dusting
Instructions
- Set your oven to 350°F (175°C) and lightly coat a 9″×9″ square baking dish with cooking spray.
- Crush the cereal: place the 2½ cups of Gluten Free Honey Nut Cheerios in a large resealable plastic bag and use a rolling pin (or food processor) to crush into fine crumbs.
- In a large bowl, combine the cereal crumbs, melted butter, granulated sugar, and pinch of salt. Stir until evenly mixed. Firmly press the mixture into the base of the prepared 9″×9″ pan to create an even crust layer.
- Bake the crust at 350°F for about 7-8 minutes, just until it begins to turn golden. Take it out of the oven and set it aside to cool as you move on to the filling.
- Raise the oven temperature to 425°F (about 220°C).
- To make the filling, use a hand mixer to blend the eggs and brown sugar in a large mixing bowl until well incorporated. Then add the pumpkin puree, evaporated milk, cinnamon, ginger, vanilla extract, and salt. Mix until smooth (note: the mixture will be quite loose).
- Pour the pumpkin filling over the cooled crust in the pan. Then bake it at 425°F for 15 minutes. After this 15-minute period, reduce the oven temperature to 350°F (about 175°C).
- Continue baking at 350°F for about 35 more minutes, or until a toothpick inserted in the center comes out clean. Take it out of the oven and let it cool completely at room temperature. Then refrigerate until chilled (this helps firm up the filling).
- Once chilled, sift powdered sugar over the top of the sliced squares before serving.
Notes
Chill bars completely before slicing for clean edges. Use a food processor for the crust if you want ultra-fine crumbs. Bars are best served cold and can be made a day ahead for convenience.
- Prep Time: 20 minutes
- Cook Time: 58 minutes
- Category: Dessert
Nutrition
- Serving Size: 1 bar
- Calories: 260
- Sugar: 18g
- Carbohydrates: 32g
- Protein: 4g