
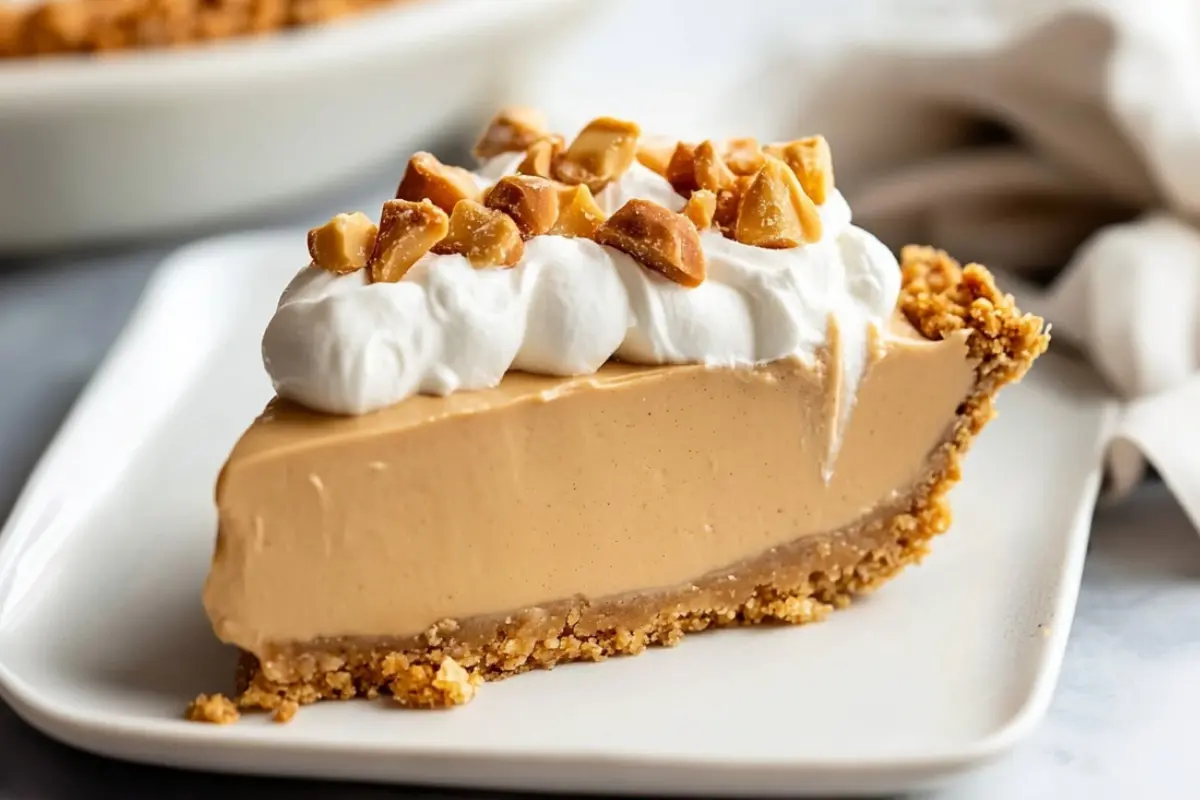
If you’re a peanut butter fanatic, this no-bake peanut butter pie will quickly become your go-to dessert. Paired with a crunchy Rice Krispies treat crust, it’s a combination that’s completely irresistible. This luscious, airy pie is a standout treat that requires zero oven time. Whether you’re hosting a festive gathering or simply indulging your sweet tooth, this pie delivers in both taste and convenience. With minimal ingredients and no baking involved, it’s an effortless way to impress your guests.
Why You’ll Love This No-Bake Peanut Butter Pie
If you’re searching for a dessert that’s quick, delicious, and doesn’t heat up your kitchen, this no-bake peanut butter pie is your answer. The crust, made from Rice Krispies, peanut butter, and honey, offers a nostalgic, chewy crunch that perfectly complements the rich, velvety filling. It’s a breeze to make ahead of time, and its creamy peanut butter flavor paired with a hint of vanilla and fluffy whipped cream topping will satisfy any sweet tooth. Best of all, it’s freezer-friendly and ideal for sharing.
Ingredients
For the Crust:
- 2 cups crisped rice cereal
- 1/3 cup creamy peanut butter (90g)
- 1/3 cup honey (113g)
For the Peanut Butter Filling:
- 8 oz cream cheese, softened (227g)
- 3/4 cup powdered sugar (94g)
- 1 cup peanut butter (270g)
- 1 cup heavy whipping cream (240g)
- 1 tsp vanilla extract (15 mL)
For Garnish:
- 1 cup heavy whipping cream (240g)
- 2 tbsp powdered sugar (15 mL)
Step-by-Step: How to Make No-Bake Peanut Butter Pie
- Prepare the Pan: Lightly grease a 9-inch pie pan with cooking spray.
- Create the Crust: In a large mixing bowl, stir together the crisped rice cereal, peanut butter, and honey until fully blended.
- Shape the Crust: Press the mixture firmly into the base and halfway up the sides of the prepared pie pan, using a greased cup or spoon to help. Place it in the fridge to chill while making the filling.
- Prepare the Filling: Beat together the cream cheese, powdered sugar, peanut butter, heavy cream, and vanilla until silky and well incorporated, about 4–5 minutes.
- Assemble the Pie: Spoon the filling into the chilled crust and smooth the surface evenly with a spatula. Let it set in the refrigerator for a minimum of 4 hours, or overnight for the cleanest slices.
- Add the Topping: Just before serving, whip the heavy cream with powdered sugar until soft peaks form, then dollop or pipe it over the pie.
Helpful Tips
- Use a measuring cup to easily press the crust into the pan evenly.
- Let the cream cheese come to room temperature for a smoother filling.
- Chill the bowl and beaters before whipping the cream for faster, fluffier results.
- Refrigerate the pie overnight to ensure it sets firmly and slices cleanly.
Substitutions and Variations
- Nut-Free: Substitute sunflower seed butter for peanut butter.
- Vegan: Use dairy-free cream cheese, whipped topping, and maple syrup instead of honey.
- Chocolate Twist: Add mini chocolate chips to the filling or drizzle melted chocolate over the top.
- Crunchy Peanut Butter: Swap creamy for crunchy peanut butter for added texture.
Storage Instructions
Keep the pie (ungarnished) covered in the fridge for up to 3 days. Add whipped cream right before serving to maintain its texture. For longer storage, wrap slices snugly in plastic and foil and freeze for up to 6 months. Allow to thaw at room temperature for 10–15 minutes before enjoying.
Nutritional Information

Each slice (1/8th of pie) provides approximately:
- Calories: 369 kcal
- Carbohydrates: 21g
- Protein: 10g
- Fat: 28g
- Saturated Fat: 15g
- Cholesterol: 69mg
- Sodium: 255mg
- Sugar: 16g
Serving Suggestions
- Garnish with chopped peanuts, chocolate shavings, or a drizzle of caramel sauce.
- Serve with a scoop of vanilla or chocolate ice cream.
- Pair with a cold glass of milk or a hot cup of coffee for a comforting dessert.
- Add a pop of freshness with a handful of seasonal berries.
Frequently Asked Questions About No-Bake Peanut Butter Pie
Can I make this pie ahead of time? Definitely. You can prepare both the crust and filling up to two days in advance. Just wait to top with whipped cream until you’re ready to serve.
Is this recipe freezer-friendly? Yes! Whether whole or in slices, wrap it securely and freeze for up to six months. Let it sit at room temperature for about 10–15 minutes before serving.
Can I use store-bought whipped topping? You sure can. If time is short, a ready-made whipped topping is a convenient alternative to homemade.
What’s the best way to get neat slices? Let the pie chill completely—overnight is ideal—and use a sharp knife cleaned between cuts.
Conclusion
Thank you so much for stopping by and trying out this delightful no-bake peanut butter pie with Rice Krispies treat crust. It’s one of my personal favorites—not just because it’s easy and no-fuss, but because every bite bursts with nostalgic, creamy, peanut-buttery goodness. Whether you’re making it for a holiday, a celebration, or just because you deserve a treat, I hope it brings as much joy to your table as it does to mine. Happy no-baking, and I can’t wait to hear how you enjoy it!
Join us on Pinterest for new mouthwatering recipes every day!
Print
No-Bake Peanut Butter Pie with Rice Krispies Treat Crust
- Total Time: 4 hours 30 minutes
- Yield: 8 slices 1x
- Diet: Vegetarian
Description
No-bake peanut butter pie with a Rice Krispies treat crust is the ultimate creamy, crunchy dessert. It’s quick to prep, full of peanut butter flavor, and perfect for parties or make-ahead treats. Give this easy, no-oven recipe a try today!
Ingredients
For the Crust:
2 cups crisped rice cereal
1/3 cup creamy peanut butter (90g)
1/3 cup honey (113g)
For the Filling:
8 oz cream cheese, softened (227g)
3/4 cup powdered sugar (94g)
1 cup peanut butter (270g)
1 cup heavy whipping cream (240g)
1 tsp vanilla extract (15 mL)
For Garnish (optional):
1 cup heavy whipping cream (240g)
2 tbsp powdered sugar (15 mL)
Instructions
- Prepare the Pan: Lightly grease a 9-inch pie pan with cooking spray.
- Create the Crust: In a large mixing bowl, stir together the crisped rice cereal, peanut butter, and honey until fully blended.
- Shape the Crust: Press the mixture firmly into the base and halfway up the sides of the prepared pie pan, using a greased cup or spoon to help. Place it in the fridge to chill while making the filling.
- Prepare the Filling: Beat together the cream cheese, powdered sugar, peanut butter, heavy cream, and vanilla until silky and well incorporated, about 4–5 minutes.
- Assemble the Pie: Spoon the filling into the chilled crust and smooth the surface evenly with a spatula. Let it set in the refrigerator for a minimum of 4 hours, or overnight for the cleanest slices.
- Add the Topping: Just before serving, whip the heavy cream with powdered sugar until soft peaks form, then dollop or pipe it over the pie.
Notes
Let cream cheese come to room temperature before mixing.
Refrigerate overnight for the cleanest slices.
Store in the fridge for up to 3 days or freeze slices for up to 6 months.
Add whipped topping right before serving for best results.
- Prep Time: 30 minutes + Time (Chill): 4 hours
- Cook Time: 0 minutes
- Category: Dessert
- Method: No-Bake
- Cuisine: American
Nutrition
- Serving Size: 1 slice
- Calories: 369
- Sugar: 16g
- Carbohydrates: 21g
- Protein: 10g