
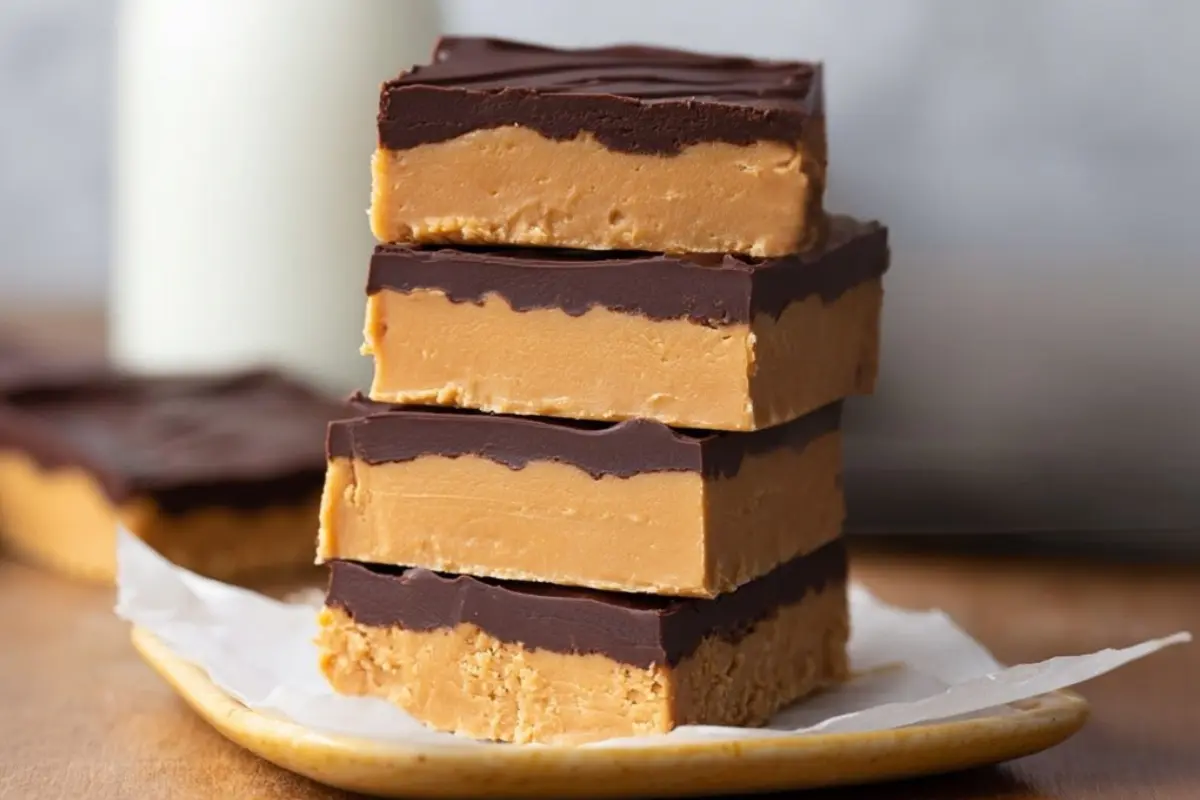
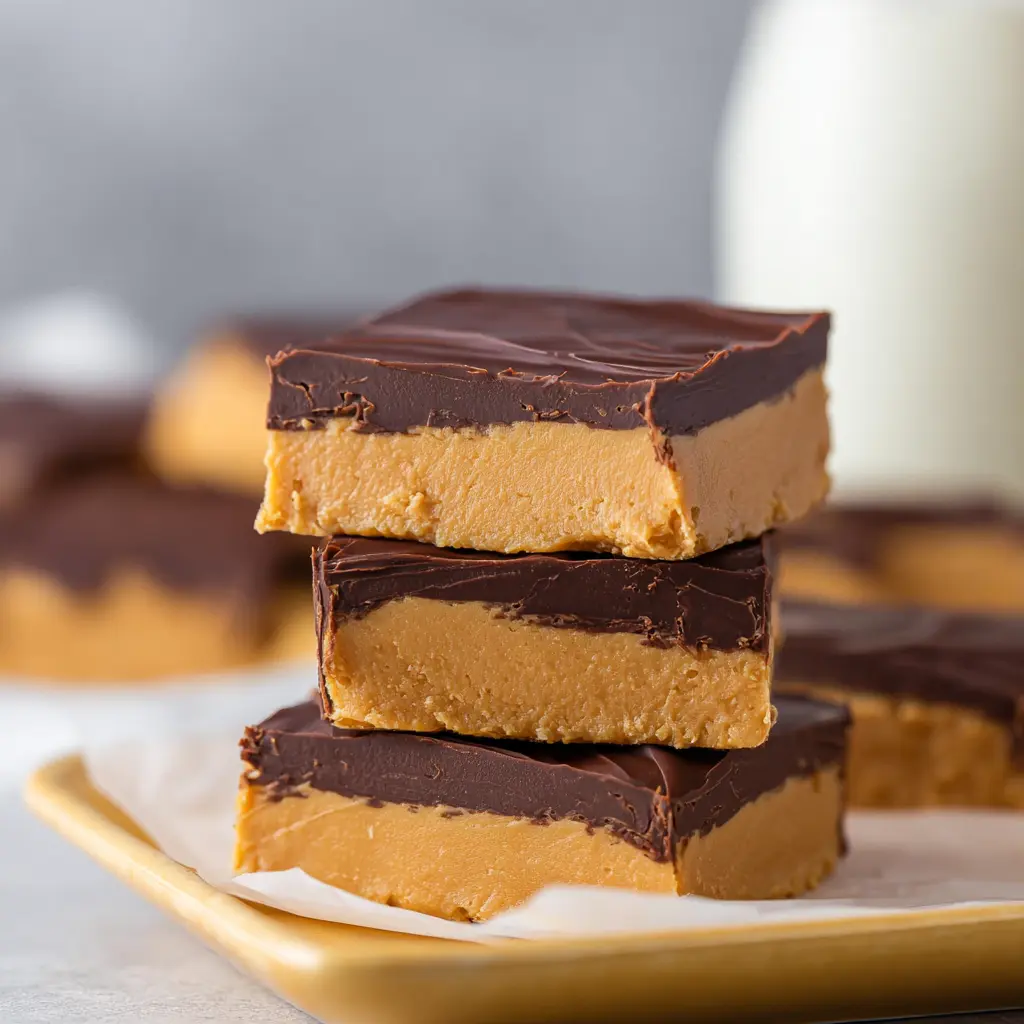
No Bake Peanut Butter Buckeye Bars are the perfect treat for when you want rich, indulgent flavors without turning on the oven. With layers of creamy peanut butter and a chocolate topping, these bars deliver all the classic charm of buckeyes in an easier bar form. Whether you’re bringing them to a gathering or keeping them for a sweet snack at home, this recipe is quick to assemble, deeply satisfying, and a guaranteed crowd‑pleaser.
In this post, I’ll walk you through everything you need—ingredients, step‑by‑step instructions, tips, variations, storage advice, nutrition, serving ideas, and FAQs—to make perfect bars every time.
Why You’ll Love These Bars
- Effortless, no oven needed — no baking means less heat in the kitchen and faster prep.
- Decadent flavor — creamy peanut butter meets smooth chocolate in every bite.
- Make ahead & giftable — these store beautifully and travel well for parties.
- Versatile — you can tweak sweetness, chocolate type, or even nut butters to suit preferences.
- Big batch friendly — this recipe yields about 26 large squares, great for sharing or freezing.
Ingredients
Peanut Butter Layer
- 1/2 cup (113 g) unsalted butter, softened
- 2 cups (480 g) creamy peanut butter
- 3 1/2 cups (420 g) powdered/confectioners’ sugar
- 1 1/2 teaspoons (7 mL) vanilla extract
Chocolate Layer
- 2 cups (≈ 360 g) chocolate chips or chopped chocolate (about 12 oz)
- 1 tablespoon (14 g) butter or coconut oil
Step‑by‑Step: How to Make No Bake Peanut Butter Buckeye Bars
- Prepare the peanut butter layer.
In a large mixing bowl, combine the 1/2 cup softened butter, 2 cups creamy peanut butter, 3 1/2 cups powdered sugar, and 1 1/2 teaspoons vanilla extract.
Use an electric mixer to beat everything together until the mixture is smooth and evenly incorporated. The dough will be very thick and may feel slightly crumbly, but it should hold together when pressed. - Press into the pan.
Line a 9×13‑inch (about 23×33 cm) baking pan with parchment paper, leaving a bit of overhang for easier removal later. Transfer the peanut butter dough into the pan and press it firmly and evenly into the bottom. Use a spatula or your hands (dip in a little powdered sugar, if needed) to smooth the top. - Melt the chocolate topping.
In a microwave‑safe bowl, combine 2 cups chocolate chips and 1 tablespoon butter or coconut oil.
Microwave in 30‑second increments, stirring in between, until the chocolate is fully melted and smooth. This usually takes about 1½ minutes total, depending on your microwave. - Top and set.
Pour the melted chocolate over the peanut butter layer and spread it out evenly with an offset spatula or the backside of a spoon. Let the bars sit at room temperature until the chocolate has mostly set—around 30 to 60 minutes. - Cut and chill.
Once the chocolate is set but not rock hard, carefully lift the bars out of the pan using the parchment overhang. Place the slab onto a cutting board and slice into squares using a sharp knife (wipe the blade between cuts for cleaner edges).
Transfer the slices to the refrigerator and chill for at least one hour (or until ready to serve) to ensure they hold their shape.
Helpful Tips
- Softened butter is key. Make sure the butter in the peanut butter layer is fully softened so the mixture blends smoothly.
- Don’t overmix powdered sugar. Mix just until combined—overworking can make the texture grainy.
- Even pressing helps. Use a firm, flat tool (like the bottom of a measuring cup) to press the peanut butter mixture evenly in the pan.
- Microwave carefully. Heat chocolate in short bursts and stir each time to avoid scorching.
- Cut while slightly soft. If chocolate is too hard, it may crack when slicing—cutting just as it’s setting gives cleaner bars.
- Clean cuts. Clean your knife blade between slices by wiping with a damp cloth or heating briefly under warm water and drying—this helps reduce dragging and smudging.
Substitutions And Variations
- Nut Butter Variations: Try almond butter, cashew butter, or sunflower seed butter (for a nut‑free version).
- Chocolate Type: Use dark chocolate, semi‑sweet, milk chocolate, or even white chocolate—adjust sweetness accordingly.
- Flavor Boosts: Stir in a pinch of salt, a dash of cinnamon, or a few drops of almond extract to the peanut butter layer.
- Crunch Add‑ins: Fold in chopped peanuts, crushed pretzels, or rice cereal for texture.
- Layer Twist: Make it a marbled bar—pour half the chocolate, swirl with peanut butter layer before topping with more chocolate.
- Vegan Option: Use vegan butter and powdered sugar (check for bone char), and use dairy‑free chocolate chips.
Storage Instructions
- Refrigerate: Store in an airtight container in the fridge for up to 1 month.
- Freeze: Freeze individual portions in airtight bags or containers for up to 4 months.
- Thawing: Thaw in the refrigerator (not at room temperature) for about 24 hours before serving.
- Serving Temp: For firmer texture, keep chilled. But letting them sit 5–10 minutes at room temperature before serving helps bring out the flavors.
Nutritional Information
- Calories: ~257 kcal
- Fat: ~16 g
- Saturated fat: ~7 g (depends on chocolate type)
- Carbohydrates: ~23 g
- Sugar: ~20 g
- Protein: ~5 g
- Fiber: ~1 g
Serving Suggestions
- Serve chilled or at cool room temperature.
- Garnish with a sprinkle of sea salt, chopped peanuts, or a drizzle of white chocolate.
- Pair with a cold glass of milk, coffee, or your favorite milk alternative.
- Cut into mini squares or bars for bite‑sized treats at parties or holiday platters.
- Include with dessert boxes, cookie swaps, or gift baskets.
Frequently Asked Questions About No Bake Peanut Butter Buckeye Bars
Can I use crunchy peanut butter instead of creamy?
Yes, you can substitute crunchy peanut butter, though the texture will be slightly chunkier. The bars will still set, but the bite will have extra bits of peanut.
Why is my peanut butter layer too soft or crumbly?
If the layer is too soft, it may be due to higher water content in certain butters or not enough powdered sugar. If it’s too crumbly, try adding a little more softened butter or a splash of milk to bring it together.
My chocolate topping cracked when I cut—what went wrong?
If the chocolate hardened fully before you cut, it can crack when slicing. Try cutting while it’s setting (still a bit soft on top). Also, allow the chocolate to thicken just enough—not rock hard—before cutting.
Can I microwave the whole pan instead of layering?
That’s not recommended, as the peanut butter mixture and chocolate layer require separate treatment. Overheating will melt the bottom and ruin the structure.
Do I need to refrigerate these bars?
Yes, refrigeration helps the bars stay firm and keeps them fresh longer. If left out too long (especially in warm temps), they may soften.
How do I get neat, clean cuts?
Use a sharp knife, wipe or warm the blade between cuts, and cut while chocolate is slightly set (not fully hardened).
Can I double this recipe?
Absolutely! Double all ingredients and use a larger pan (e.g., 9×13 plus an additional half sheet or two 9×13 pans). Keep layer thickness consistent.
Conclusion
Thank you for reading and giving No Bake Peanut Butter Buckeye Bars a shot in your kitchen! I truly love how these bars combine simplicity and decadence—no oven needed, yet they taste like something made in a bakery. I hope you find this recipe as fun and satisfying to make as it is to devour.
Join us on Pinterest for new mouthwatering recipes every day!
Print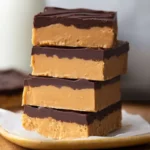
No Bake Peanut Butter Buckeye Bars
- Total Time: 1 hour 20 minutes (includes chilling)
- Yield: 26 large squares 1x
Description
These No Bake Peanut Butter Buckeye Bars feature a thick peanut butter base topped with smooth chocolate. No oven needed and ready in minutes—perfect for holidays, parties, or a sweet snack fix.
Ingredients
½ cup (113 g) unsalted butter, softened
2 cups (480 g) creamy peanut butter
3 ½ cups (420 g) powdered sugar
1 ½ teaspoons (7 ml) vanilla extract
2 cups (360 g) chocolate chips or chunks
1 tablespoon (14 g) butter or coconut oil
Instructions
- Prepare the peanut butter layer.
In a large mixing bowl, combine the 1/2 cup softened butter, 2 cups creamy peanut butter, 3 1/2 cups powdered sugar, and 1 1/2 teaspoons vanilla extract.
Use an electric mixer to beat everything together until the mixture is smooth and evenly incorporated. The dough will be very thick and may feel slightly crumbly, but it should hold together when pressed. - Press into the pan.
Line a 9×13‑inch (about 23×33 cm) baking pan with parchment paper, leaving a bit of overhang for easier removal later. Transfer the peanut butter dough into the pan and press it firmly and evenly into the bottom. Use a spatula or your hands (dip in a little powdered sugar, if needed) to smooth the top. - Melt the chocolate topping.
In a microwave‑safe bowl, combine 2 cups chocolate chips and 1 tablespoon butter or coconut oil.
Microwave in 30‑second increments, stirring in between, until the chocolate is fully melted and smooth. This usually takes about 1½ minutes total, depending on your microwave. - Top and set.
Pour the melted chocolate over the peanut butter layer and spread it out evenly with an offset spatula or the backside of a spoon. Let the bars sit at room temperature until the chocolate has mostly set—around 30 to 60 minutes. - Cut and chill.
Once the chocolate is set but not rock hard, carefully lift the bars out of the pan using the parchment overhang. Place the slab onto a cutting board and slice into squares using a sharp knife (wipe the blade between cuts for cleaner edges).
Transfer the slices to the refrigerator and chill for at least one hour (or until ready to serve) to ensure they hold their shape.
Notes
Let chocolate partially set before slicing to avoid cracking.
Store refrigerated for up to 1 month or freeze for 4 months.
Avoid high-water-content butter brands for better texture.
- Prep Time: 20 minutes
- Cook Time: 0 minutes
- Category: Dessert
Nutrition
- Serving Size: 1 large square
- Calories: 257 kcal
- Sugar: 20 g
- Carbohydrates: 23 g
- Protein: 5 g