
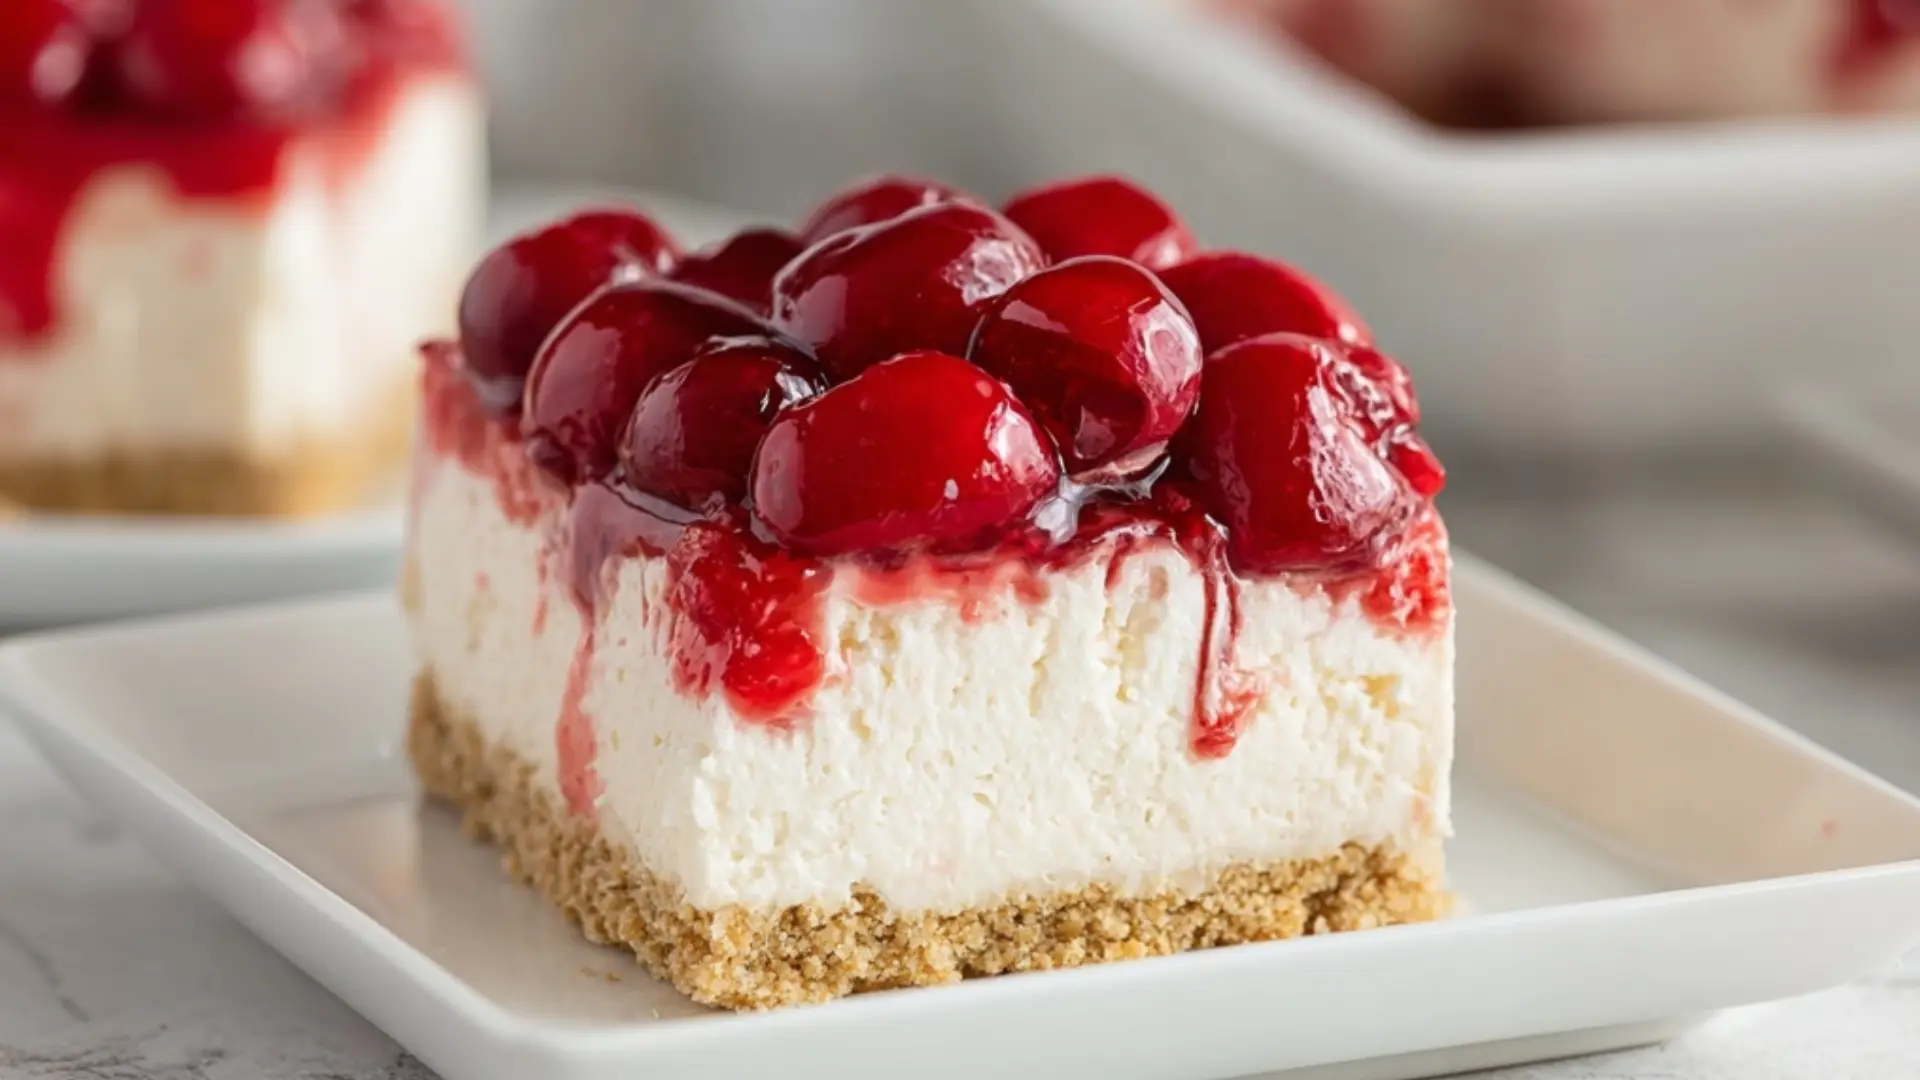
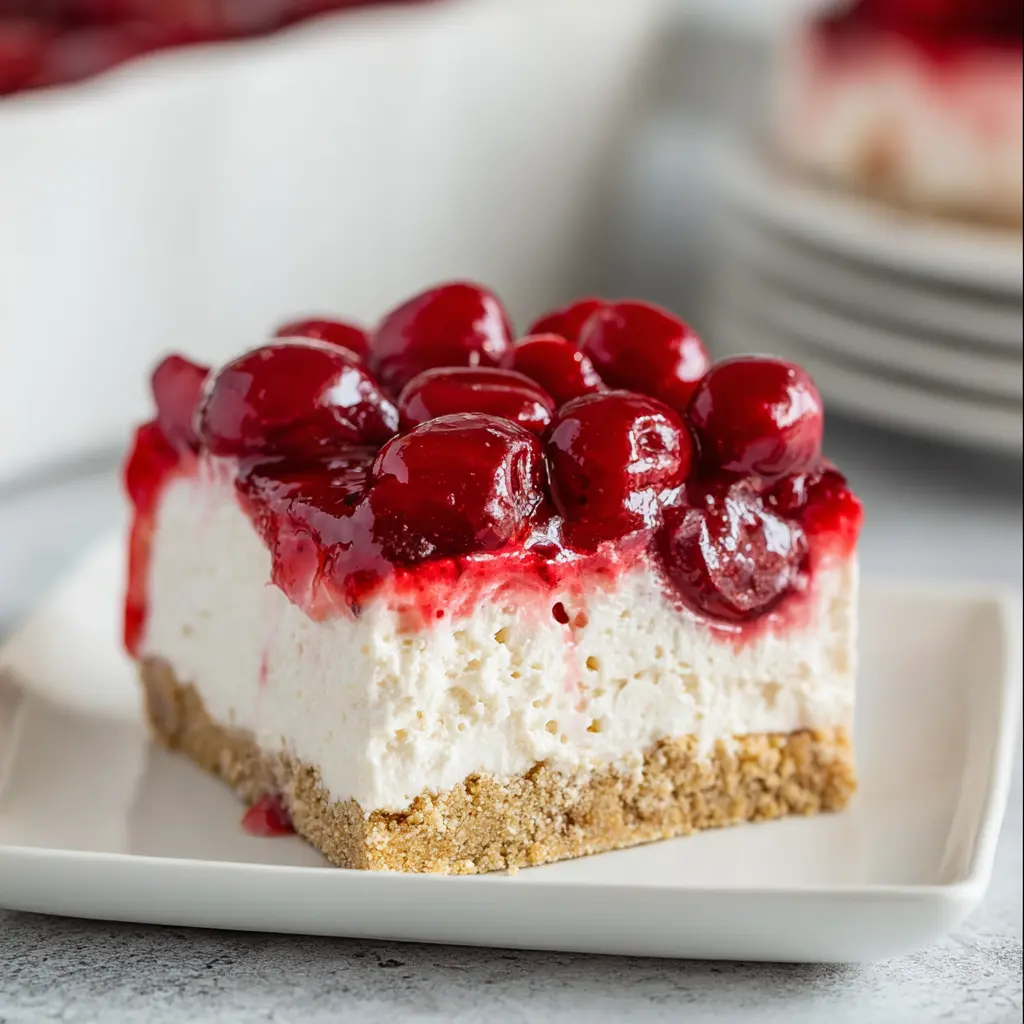
No Bake Cherry Cheesecake Dessert is a luscious and creamy dessert that combines the tang of cream cheese with the sweetness of cherries — all without firing up your oven. This effortless cheesecake recipe is perfect for warm days, potlucks, or anytime you want an impressive dessert that practically makes itself. In about 4–6 hours of chill time (or overnight), you’ll transform a few simple ingredients into a decadent treat with a buttery graham cracker crust, cloud‑light cheesecake filling, and a vibrant cherry topping. Whether you’re a beginner or a seasoned baker, this no bake cherry cheesecake will become a treasured staple in your recipe collection.
Why You’ll Love This No Bake Cherry Cheesecake Dessert
-
Effortless and oven‑free: With no baking involved, there’s no risk of cracks or overbaking.
-
Quick to assemble: Most active time is just mixing and pressing.
-
Crowd‑pleaser: The cherry topping adds a pop of color and flavor that appeals to everyone.
-
Versatile and customizable: You can swap in other pie fillings (strawberry, blueberry) or even fresh fruit.
-
Make‑ahead friendly: You can refrigerate overnight, making it ideal for parties or busy schedules.
Ingredients
Here’s everything you’ll need for a classic No-Bake Cherry Cheesecake:
For the Crust
-
9 graham crackers (about one sleeve)
-
2 Tbsp granulated sugar
-
¼ tsp salt
-
8 Tbsp (1 stick) unsalted butter, melted
For the Cheesecake Filling
-
16 oz (2 blocks) cream cheese, softened
-
1 cup confectioners’ (powdered) sugar
-
1 tsp vanilla extract
-
1 tsp fresh lemon juice
-
8 oz Cool Whip (or whipped topping)
For the Topping
-
21 oz (1 can) cherry pie filling
(Optional garnish: fresh cherries, mint leaves)
Step‑by‑Step: How to Make No Bake Cherry Cheesecake Dessert
1. Prepare your pan
Line an 8×8‑inch baking dish (or similar size) with parchment paper, leaving a couple of edges long enough to overhang. This makes it easy to lift the cheesecake out later.
2. Make the crust
-
Crush the graham crackers: Use a food processor to pulse them into fine crumbs. If you don’t have one, place crackers in a zip‑top bag and use a rolling pin or mallet to break them down.
-
Combine crust ingredients: In a medium bowl, mix together graham cracker crumbs, granulated sugar, salt, and melted butter until the crumbs are evenly moistened.
-
Press into pan: Firmly press the crumb mixture into the bottom of your prepared pan. Press firmly using a flat-bottomed glass or measuring cup to ensure the crust is evenly compacted.
-
Chill: Place the crust in the refrigerator while you prepare the filling.
3. Make the cheesecake filling
-
Whip the cream cheese with an electric mixer until it becomes silky smooth and lump-free.
-
Incorporate the sugar, vanilla, and lemon juice by mixing until the blend is creamy and fully integrated.
-
Gently fold in the Cool Whip until the mixture is smooth and fluffy.
4. Assemble and chill
-
Pour filling over crust: Spread the cheesecake mixture over the chilled graham base, smoothing the top with a spatula.
-
Cover and chill: Cover the pan (foil or plastic wrap) and refrigerate for at least 4 to 6 hours, or ideally overnight, to let it set.
5. Add cherry topping & serve
-
Just before serving, spoon or spread the cherry pie filling evenly over the top.
-
Use the parchment overhang to lift the cheesecake slab from the pan and slice into squares.
-
Garnish if desired, and serve cold.
Helpful Tips
-
Soften cream cheese fully: Let it sit at room temperature for 30 minutes, or microwave in short 5‑second bursts (if needed) to avoid lumps.
-
Don’t overmix: Fold gently when incorporating whipped topping to keep the filling light and airy.
-
Crust uniformity: Press the crust firmly and evenly so the base doesn’t crumble when slicing.
-
Chill time matters: If you try to cut too early, the cheesecake may crack or be too soft.
-
Clean slices: Wipe your knife with a warm, damp cloth between cuts for neat edges.
Substitutions and Variations
-
Crust alternatives: Use digestive biscuits, vanilla wafers, or even chocolate graham crackers.
-
Fruit toppings: Swap cherry pie filling with strawberry, blueberry, raspberry, or mixed berry.
-
Fresh fruit: Instead of canned filling, use macerated fresh cherries or berries with a touch of sugar and cornstarch.
-
Flavored layers: Add a layer of chocolate ganache, a swirl of jam, or a drizzle of caramel before the cherry topping.
-
Dairy‑free/vegan option: Use dairy‑free cream cheese and whipped topping alternatives.
-
Mini versions: Make individual servings in small jars or ramekins for portable desserts.
Storage Instructions
-
Refrigeration: Store the cheesecake (covered) in the fridge for up to 3–4 days.
-
Freezing: You can freeze the assembled cheesecake (without cherry topping) for up to 1 month. Thaw overnight in the fridge, then add topping fresh.
-
Avoid sogginess: Keep cut sides well covered or wrapped to prevent drying out or absorbing fridge odors.
Nutritional Information
-
Calories: ~502 kcal
-
Carbohydrates: ~54 g
-
Protein: ~5 g
-
Fat: ~30 g
-
Saturated Fat: ~18 g
-
Polyunsaturated Fat: ~1 g
-
Monounsaturated Fat: ~8 g
-
Trans Fat: ~0.4 g
-
Cholesterol: ~82 mg
-
Sodium: ~426 mg
-
Potassium: ~193 mg
-
Fiber: ~1 g
-
Sugar: ~25 g
-
Vitamin A: ~1,168 IU
-
Vitamin C: ~3 mg
-
Calcium: ~98 mg
-
Iron: ~1 mg
Serving Suggestions
-
Serve chilled on dessert plates with a dollop of whipped cream or a mint sprig.
-
Pair with a cold cup of coffee, iced tea, or sparkling water to balance the sweetness.
-
For a festive touch, sprinkle chocolate shavings or a dusting of powdered sugar on top.
-
Serve on a decorative platter or slate for an elegant presentation.
Frequently Asked Questions About No Bake Cherry Cheesecake
Can I use another crust besides graham cracker?
Absolutely! You can substitute with vanilla wafers, digestive biscuits, chocolate cookies, or even crushed shortbread. Just be sure to adjust the sugar and butter amounts so the crust holds together well. The important part is getting a firm, compact base so that when you slice the cheesecake, it doesn’t crumble.
How long should I let it chill before serving?
At least 4 to 6 hours is recommended, but overnight is ideal. The additional chilling time helps the filling set fully and improves sliceability. Cutting too soon may lead to a runny texture or uneven servings.
Can I make this in a springform pan instead?
Yes, you can use a springform pan (8‑ or 9‑inch) instead of the 8×8 dish. Just line the bottom with parchment and let the sides rise. Use the cherry topping just before serving.
Why is my filling grainy or lumpy?
That typically happens if the cream cheese wasn’t fully softened or if it was overmixed. Always ensure the cream cheese is room temperature and beat it until completely smooth before adding the remaining ingredients.
Can I freeze leftover cheesecake with the cherry topping?
You can, but freezing with the cherry topping may slightly affect texture. It’s best to freeze without topping, then thaw and add cherry filling fresh. The base cheesecake can be frozen for up to one month when sealed tightly.
Conclusion
Thank you so much for trying out this no bake cherry cheesecake dessert recipe — I hope it becomes one of your favorite go‑to dessert recipes! It’s a dream come true for cheesecake lovers who don’t want to deal with ovens or cracks. The creamy filling, buttery crust, and vibrant cherry topping come together in a way that always feels special yet remains simple. I truly enjoy making this at home when I want something beautiful, delicious, and effortless. Wishing you joy, sweetness, and lots of happy smiles as you slice into your cheesecake. Enjoy making and sharing it with loved ones — and thank you for being part of this food‑loving community!
Join us on Pinterest for new mouthwatering recipes every day!
Print
No Bake Cherry Cheesecake Dessert
- Author: lisa
- Total Time: 4 hours 15 minutes
- Yield: 9 servings 1x
Description
No Bake Cherry Cheesecake Dessert is a quick, creamy, and crowd-pleasing dessert with layers of buttery crust, smooth cheesecake, and vibrant cherry topping — all made without turning on the oven.
Ingredients
Crust:
9 graham crackers
2 Tbsp granulated sugar
¼ tsp salt
8 Tbsp (1 stick) unsalted butter, melted
Cheesecake Filling:
16 oz cream cheese, softened
1 cup powdered sugar
1 tsp vanilla extract
1 tsp lemon juice (fresh)
8 oz Cool Whip
Topping:
21 oz cherry pie filling
Instructions
Prepare your pan
Line an 8×8‑inch baking dish (or similar size) with parchment paper, leaving a couple of edges long enough to overhang. This makes it easy to lift the cheesecake out later.
2. Make the crust
-
Crush the graham crackers: Use a food processor to pulse them into fine crumbs. If you don’t have one, place crackers in a zip‑top bag and use a rolling pin or mallet to break them down.
-
Combine crust ingredients: In a medium bowl, mix together graham cracker crumbs, granulated sugar, salt, and melted butter until the crumbs are evenly moistened.
-
Press into pan: Firmly press the crumb mixture into the bottom of your prepared pan. Press firmly using a flat-bottomed glass or measuring cup to ensure the crust is evenly compacted.
-
Chill: Place the crust in the refrigerator while you prepare the filling.
3. Make the cheesecake filling
-
Whip the cream cheese with an electric mixer until it becomes silky smooth and lump-free.
-
Incorporate the sugar, vanilla, and lemon juice by mixing until the blend is creamy and fully integrated.
-
Gently fold in the Cool Whip until the mixture is smooth and fluffy.
4. Assemble and chill
-
Pour filling over crust: Spread the cheesecake mixture over the chilled graham base, smoothing the top with a spatula.
-
Cover and chill: Cover the pan (foil or plastic wrap) and refrigerate for at least 4 to 6 hours, or ideally overnight, to let it set.
5. Add cherry topping & serve
-
Just before serving, spoon or spread the cherry pie filling evenly over the top.
-
Use the parchment overhang to lift the cheesecake slab from the pan and slice into squares.
-
Garnish if desired, and serve cold.
Notes
Chill time is essential for the cheesecake to set properly.
For neater slices, wipe your knife clean between cuts.
Can substitute cherry pie filling with any fruit topping.
- Prep Time: 15 minutes
- Cook Time: 0 minutes
- Category: Dessert
Nutrition
- Serving Size: 1 square (1/9 of recipe)
- Calories: 502
- Sugar: 25g
- Carbohydrates: 54g
- Protein: 5g