
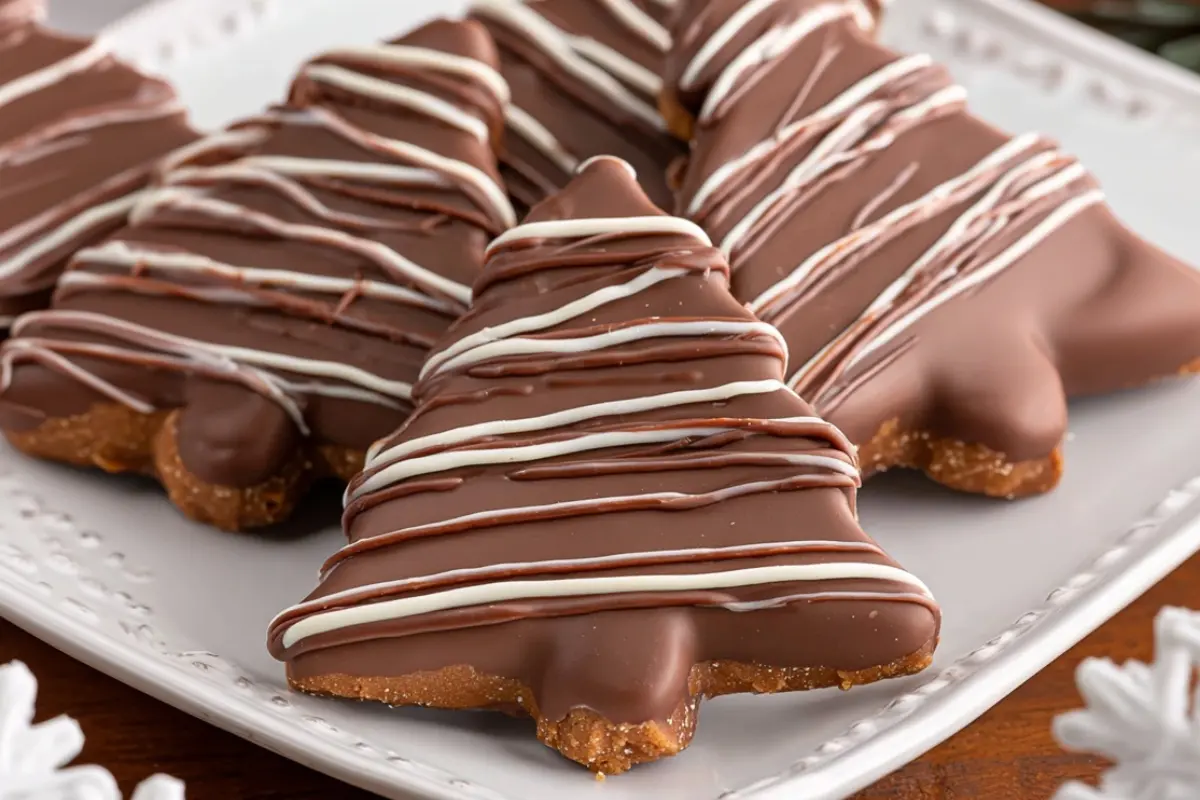
Chocolate Peanut Butter Christmas Trees are the ultimate festive treat that combines the rich, nutty flavor of peanut butter with smooth, decadent chocolate. If you’re looking to add a bit of holiday magic to your dessert table, these little tree-shaped treats are perfect. They’re simple to make, completely no‑bake, and come together with just a few pantry staples. Whether you’re baking them for a holiday party, gifting them in a festive tin, or enjoying them under the twinkling lights of your Christmas tree, these treats bring joy with every bite. Best of all, you don’t need master baking skills — just some patience with freezing and a little love for chocolate and peanut butter.
Why You’ll Love This Recipe
-
Festively fun: The Christmas tree shape adds a charming holiday vibe. Kids and adults alike smile when they see little chocolate‑covered trees ready for snacking.
-
Rich and indulgent: The creamy peanut butter base and smooth chocolate coating deliver a perfect balance of flavors — nutty, slightly salty, and sweet.
-
Easy and no‑bake: No oven required. Simply mix, chill, cut, coat, and freeze. It’s ideal for busy holiday seasons when ovens are reserved for roasts and pies.
-
Make‑ahead friendly: You can prepare these in advance, store them in the fridge or freezer, and pull them out whenever you’re ready to serve.
-
Perfect for gifting: Wrapped in festive cellophane or packed into a holiday tin, these treats make heartwarming homemade gifts.
Ingredients
-
½ cup salted butter, melted and cooled
-
2 cups creamy peanut butter
-
¼ cup granulated sugar
-
1 tablespoon vanilla extract
-
4 cups powdered sugar
-
3 cups semi‑sweet chocolate chips (or a mix of semi‑sweet and milk chocolate chips)
-
2 tablespoons shortening
-
For drizzle (optional):
-
½ cup milk chocolate chips or pieces
-
½ cup white chocolate chips or pieces
-
1 teaspoon shortening, divided in half
-
Step-by-Step How to Make Chocolate Peanut Butter Christmas Trees
-
Prepare for chilling
Line a jelly roll pan or half‑sheet pan with parchment paper and set it aside. This helps with easy lifting later. -
Make the peanut butter mixture
In a large bowl, use a hand mixer to beat together the melted (and cooled) butter, creamy peanut butter, granulated sugar, and vanilla extract. Mix until the mixture is smooth and creamy. Gradually beat in the powdered sugar until the mixture becomes firm and pliable — like dough. -
Press and chill
Transfer the peanut butter mixture to the prepared pan. Use a spatula or your hands (covered with plastic wrap) to press it evenly into a roughly ½‑inch thick layer. Smooth the top so it’s even. Place the pan in the freezer for 15 minutes. This helps firm up the base so you can cut out shapes neatly. -
Cut out Christmas trees
After the initial freeze, carefully lift the parchment paper to remove the firm peanut butter layer from the pan. Place a fresh sheet of parchment paper back onto the pan. Using a small Christmas tree cookie cutter, cut out shapes from the chilled peanut butter layer — aim for roughly ½‑inch thick. Transfer the cutouts to a new parchment‑lined sheet pan. -
Reuse scraps
Scoop up the leftover peanut butter mixture, press it again to ½‑inch thickness, and cut out additional trees until you’ve used as much as possible. Freeze the shaped trees for another 25–30 minutes so they firm up completely. -
Prepare the chocolate coating
In a heatproof bowl, combine the semi‑sweet (or semi + milk) chocolate chips with 2 tablespoons of shortening. Microwave in 30‑second intervals, stirring after each session until the chocolate is fully melted and smooth. The shortening helps the chocolate coat evenly and prevents it from developing a dull or streaky finish. -
Coat the peanut butter trees
Remove a few chilled peanut butter cutouts from the freezer at a time. Using a fork, dip each tree into the melted chocolate, coating it completely. Tap the fork gently to let excess chocolate drip off, then place the coated tree back onto the parchment‑lined tray. Work in batches to avoid melting the peanut butter center from handling. -
Let the chocolate set
Allow the chocolate coating to harden at room temperature or place the tray in the refrigerator to speed up the process. -
Optional drizzle for decoration
For a festive touch, prepare a drizzle: melt the milk chocolate and white chocolate chips (half teaspoon shortening per ½ cup of chips) in separate bowls using the microwave in 30‑second bursts until smooth. Transfer each melted chocolate into a small piping bag or a plastic sandwich bag. Snip a tiny corner off the bag and drizzle zigzag patterns over the chocolate‑coated trees. Let the drizzle set for about 5 minutes. -
Serve or store
Once the chocolate is fully set, your Chocolate Peanut Butter Christmas Trees are ready to enjoy or store away for later.
Helpful Tips
-
Work quickly once the peanut butter mixture is chilled — if it softens too much while coating, return it to the freezer briefly.
-
Use a small cookie cutter (about 2–3 inches tall) to get the most trees out of the mixture. Larger cutters will yield fewer treats.
-
If the melted chocolate thickens while you are coating, microwave it for another 10–15 seconds to restore fluidity.
-
For a shiny, “store‑bought” finish, let the coated trees sit at room temperature for several minutes after coating and then refrigerate briefly. This helps the shortening in the chocolate bloom out less, keeping the surface smooth.
-
To prevent fingerprints marking the chocolate, use parchment paper or small muffin liners to transfer the coated trees.
Substitutions and Variations
-
Nut‑free version: Replace the peanut butter with a smooth sunflower seed butter or cookie butter. The flavor will be different but still delicious.
-
Flavor variation: Add a pinch of sea salt on top of each tree before the chocolate sets for a salty‑sweet contrast. You can also mix in ½ teaspoon of cinnamon or pumpkin pie spice into the peanut butter mixture for a seasonal twist.
-
White chocolate version: Use all white chocolate for coating or drizzle, for a snowy winter look.
-
Mini trees or bites: Use a small star or sapling cutter to create bite‑size versions — great for kids or for snacking at parties.
-
Sprinkles or nuts: While the chocolate is still wet, sprinkle crushed nuts, holiday sprinkles, or crushed candy canes for extra texture and festive look.
Storage Instructions
Store your Chocolate Peanut Butter Christmas Trees in a tightly sealed container. If you plan to enjoy them within a few days, keep them at room temperature in a cool, dry spot. For longer storage — up to a few weeks — place them in the refrigerator. If you want to keep them fresh for a month or more, layer them between sheets of parchment paper and store them in an airtight container in the freezer.
When ready to serve from the freezer, allow them to sit at room temperature for 10–15 minutes to soften just a little before eating.
Nutritional Information (per serving, based on 24 trees)

Calories: 428 kcal
Carbohydrates: 43 g
Protein: 7 g
Fat: 27 g
Saturated Fat: 11 g
Polyunsaturated Fat: 4 g
Monounsaturated Fat: 10 g
Trans Fat: 1 g
Cholesterol: 13 mg
Sodium: 141 mg
Potassium: 280 mg
Fiber: 3 g
Sugar: 37 g
Vitamin A: 139 IU
Vitamin C: 1 mg
Calcium: 36 mg
Iron: 2 mg
Keep in mind that nutrition will vary slightly depending on the exact brands and sizes of ingredients used.
Serving Suggestions
-
Arrange the trees on a festive holiday platter or tiered dessert stand — they make a beautiful centerpiece at a Christmas cookie exchange or holiday gathering.
-
Pair them with a glass of cold milk, hot cocoa, or a warm non‑dairy latte for a cozy winter treat.
-
Use them as edible decorations: press a toothpick into each tree and stick into cupcakes, cakes, or even a holiday gingerbread house.
-
Wrap a few in cellophane and tie with ribbon for thoughtful homemade gifts — perfect for neighbors, teachers, or coworkers.
Frequently Asked Questions About Chocolate Peanut Butter Christmas Trees
How long will these treats stay fresh?
When stored in an airtight container at room temperature, they stay fresh for up to 5–7 days. If kept in the refrigerator, they’ll remain at their best for up to two weeks. For longer storage, freezing is best — they can last about a month in the freezer when layered between parchment paper to prevent sticking.
Can I use crunchy peanut butter instead of creamy?
Yes, you can use crunchy peanut butter for added texture, though the coating might not be quite as smooth. The bit of crunch inside can be charming, but it may lead to slightly more fragile edges when cutting shapes.
What if I do not have shortening?
You can skip the shortening — just melt the chocolate chips on their own. The coating will still work, though the chocolate may be a bit thicker and could set a little duller. The end result is still delicious.
Can I make different shapes other than Christmas trees?
Absolutely. You can use any cookie cutter shape you like — stars, snowflakes, hearts, or even more festive shapes such as bells. This recipe lends itself to creativity, so feel free to customize.
Is there a way to make them dairy‑free or vegan?
Yes. Use a non‑dairy butter substitute for the melted butter, and choose dairy‑free chocolate chips or coatings. Make sure the peanut butter is free of dairy additives. The texture may vary a little, but you will still get a delicious, vegan‑friendly holiday treat.
Final Thoughts
Thank you for giving these Chocolate Peanut Butter Christmas Trees a try this holiday season. There is something truly special about homemade treats shaped like festive evergreens — they bring nostalgia, warmth, and a bit of holiday magic into your kitchen. I love how creamy peanut butter and rich chocolate come together to create a dessert that is easy, fun, and crowd‑pleasing. Whether you’re sharing them with family, gifting them to friends, or savoring a few quietly by yourself with a warm drink, I hope these little trees bring you as much joy as they bring me. Wishing you a delightful and stress‑free baking experience. Enjoy these sweet bites of holiday cheer and happy cooking!
Join us on Pinterest for new mouthwatering recipes every day!
Print
Chocolate Peanut Butter Christmas Trees Recipe
- Total Time: 1 hour 45 minutes
- Yield: 24 trees (depending on cutter size) 1x
- Diet: Vegetarian
Description
Chocolate Peanut Butter Christmas Trees are festive, no-bake treats made with creamy peanut butter and rich chocolate. Shaped into cute holiday trees, these easy-to-make sweets are perfect for cookie trays, gift boxes, or cozy family gatherings. Try this holiday favorite today!
Ingredients
½ cup salted butter, melted and cooled
2 cups creamy peanut butter
¼ cup granulated sugar
1 tablespoon vanilla extract
4 cups powdered sugar
3 cups semi-sweet chocolate chips (or a mix of semi-sweet and milk chocolate)
2 tablespoons shortening
Optional Drizzle:
½ cup milk chocolate chips or pieces
½ cup white chocolate chips or pieces
1 teaspoon shortening, divided
Instructions
-
Prepare for chilling
Line a jelly roll pan or half‑sheet pan with parchment paper and set it aside. This helps with easy lifting later. -
Make the peanut butter mixture
In a large bowl, use a hand mixer to beat together the melted (and cooled) butter, creamy peanut butter, granulated sugar, and vanilla extract. Mix until the mixture is smooth and creamy. Gradually beat in the powdered sugar until the mixture becomes firm and pliable — like dough. -
Press and chill
Transfer the peanut butter mixture to the prepared pan. Use a spatula or your hands (covered with plastic wrap) to press it evenly into a roughly ½‑inch thick layer. Smooth the top so it’s even. Place the pan in the freezer for 15 minutes. This helps firm up the base so you can cut out shapes neatly. -
Cut out Christmas trees
After the initial freeze, carefully lift the parchment paper to remove the firm peanut butter layer from the pan. Place a fresh sheet of parchment paper back onto the pan. Using a small Christmas tree cookie cutter, cut out shapes from the chilled peanut butter layer — aim for roughly ½‑inch thick. Transfer the cutouts to a new parchment‑lined sheet pan. -
Reuse scraps
Scoop up the leftover peanut butter mixture, press it again to ½‑inch thickness, and cut out additional trees until you’ve used as much as possible. Freeze the shaped trees for another 25–30 minutes so they firm up completely. -
Prepare the chocolate coating
In a heatproof bowl, combine the semi‑sweet (or semi + milk) chocolate chips with 2 tablespoons of shortening. Microwave in 30‑second intervals, stirring after each session until the chocolate is fully melted and smooth. The shortening helps the chocolate coat evenly and prevents it from developing a dull or streaky finish. -
Coat the peanut butter trees
Remove a few chilled peanut butter cutouts from the freezer at a time. Using a fork, dip each tree into the melted chocolate, coating it completely. Tap the fork gently to let excess chocolate drip off, then place the coated tree back onto the parchment‑lined tray. Work in batches to avoid melting the peanut butter center from handling. -
Let the chocolate set
Allow the chocolate coating to harden at room temperature or place the tray in the refrigerator to speed up the process. -
Optional drizzle for decoration
For a festive touch, prepare a drizzle: melt the milk chocolate and white chocolate chips (half teaspoon shortening per ½ cup of chips) in separate bowls using the microwave in 30‑second bursts until smooth. Transfer each melted chocolate into a small piping bag or a plastic sandwich bag. Snip a tiny corner off the bag and drizzle zigzag patterns over the chocolate‑coated trees. Let the drizzle set for about 5 minutes. -
Serve or store
Once the chocolate is fully set, your Chocolate Peanut Butter Christmas Trees are ready to enjoy or store away for later.
Notes
Cookie cutter size will affect final yield.
Shortening in the chocolate helps create a smooth coating and prevents chocolate bloom.
Reheat chocolate briefly if it thickens during coating.
Store in a cool place or freeze for longer shelf life.
- Prep Time: 45 minutes Chill Time: 1 hour
- Cook Time: 0 minutes (no-bake)
- Category: Dessert
- Method: No-Bake
- Cuisine: American
Nutrition
- Serving Size: 1 tree
- Calories: 428 kcal
- Sugar: 37 g
- Carbohydrates: 43g
- Protein: 7g