
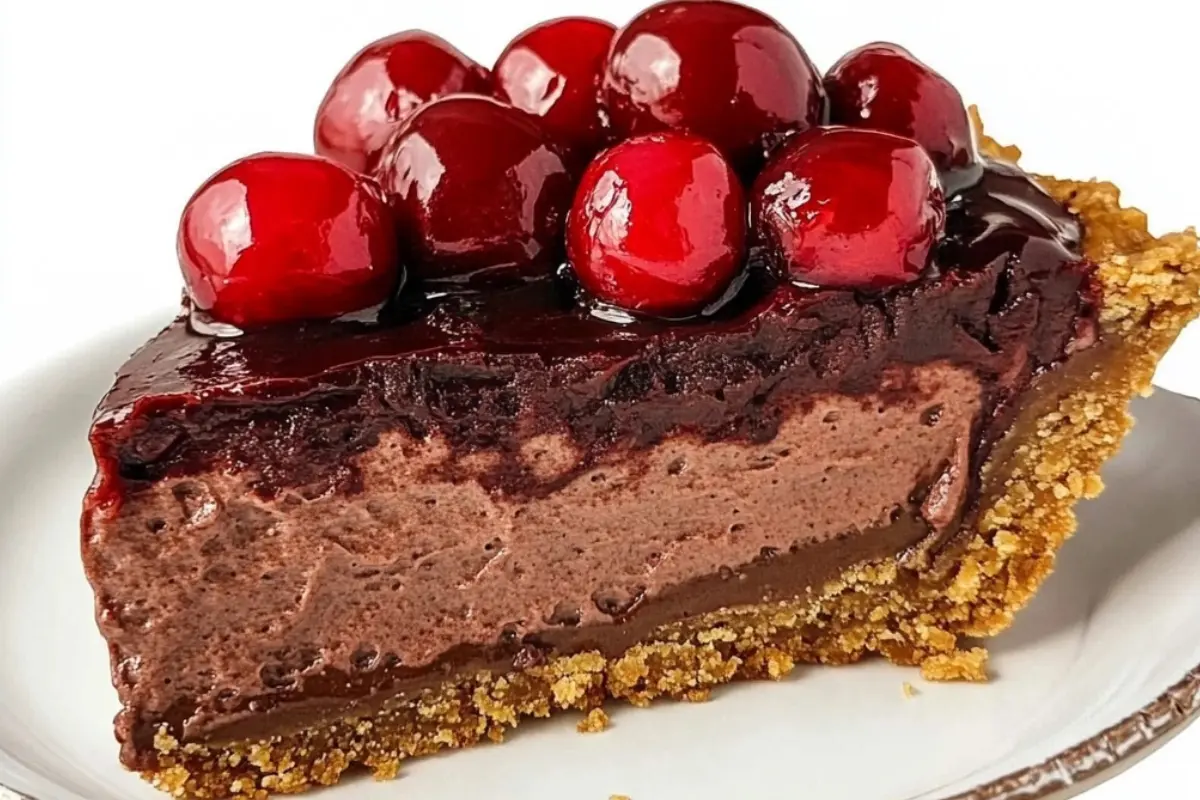
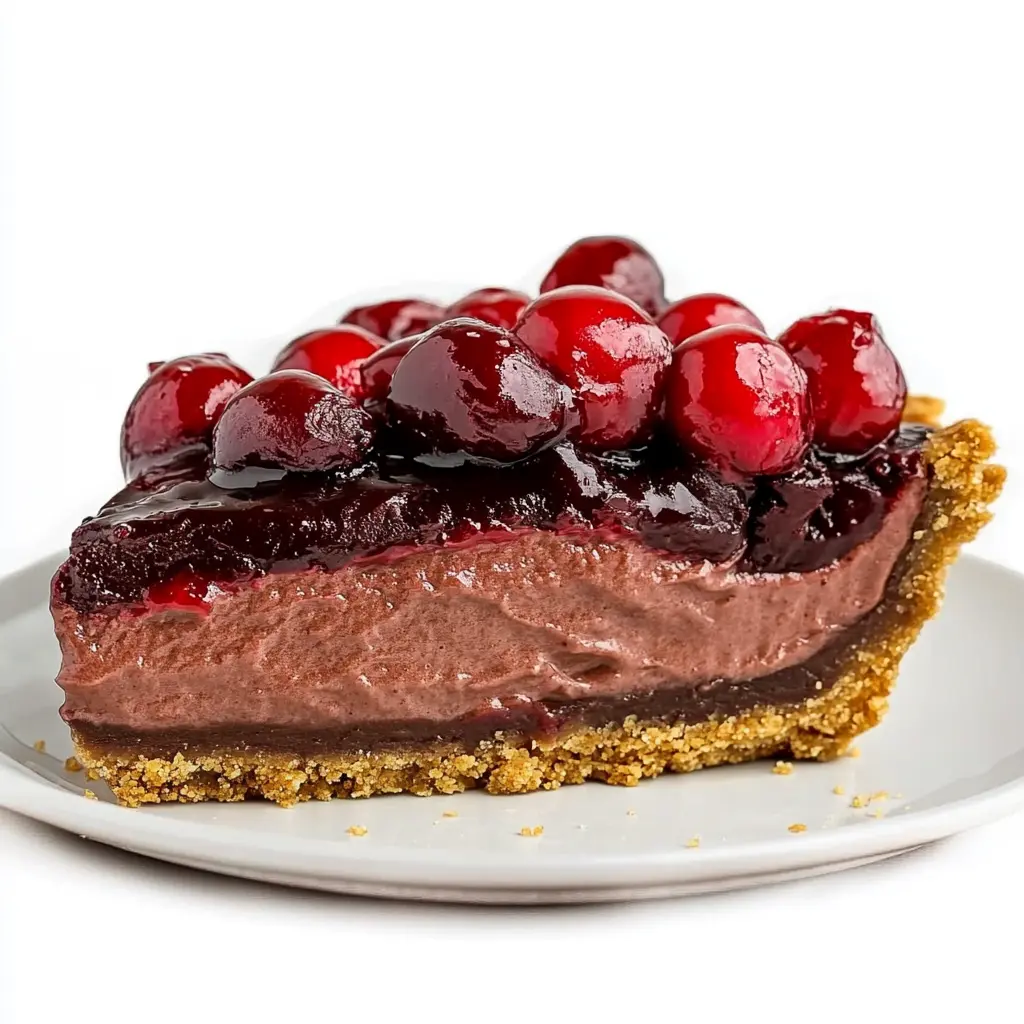
Before I dive into the luscious details of this recipe, let me just say—thank you. Thank you for being here. So let’s talk about this Cherry Chocolate Cream Cheese Pie. It’s a no-bake dream that layers fluffy cream cheese filling, bursts of cherry, and rich chocolate chips—all nestled into a crunchy chocolate crust. The flavors play beautifully together, creating a dessert that’s part cheesecake, part pie, and absolutely irresistible. I promised you versatile, and here’s proof! Whether you’re entertaining guests or just treating yourself (highly recommend), this pie is a showstopper.
And let me tell you—the smell when this comes together in the kitchen? Heavenly.
Ingredients
Here’s what you’ll need to make this indulgent delight:
For the crust:
-
1 prepared 9-inch chocolate pie crust (store-bought or homemade)
For the cream cheese filling:
-
8 oz cream cheese, softened to room temperature
-
1 cup powdered sugar
-
1 tsp vanilla extract
-
1 container (8 oz) whipped topping (like Cool Whip), thawed
-
1 cup mini chocolate chips
For the topping:
-
1 can (21 oz) cherry pie filling
-
Extra whipped topping (for garnish)
-
Chocolate shavings or more mini chocolate chips
-
Maraschino cherries (optional but adorable!)
How to Make Cherry Chocolate Cream Cheese Pie
This pie comes together so easily—honestly, the hardest part is waiting for it to chill!
Step 1: Make the Cream Cheese Filling
In a large bowl, beat the softened cream cheese until smooth and fluffy. You want no lumps here, just silky creaminess. Then gradually mix in the powdered sugar and vanilla extract. Once it’s fully incorporated, gently fold in the thawed whipped topping. The filling should be light, airy, and oh-so-lush.
Step 2: Fold in the Chocolate Chips
Next, add in those glorious mini chocolate chips. I love how they give the filling little pops of chocolatey texture with every bite. Fold them in gently so you don’t deflate the whipped topping.
Step 3: Assemble the Layers
Take your chocolate crust and spoon in half of the cream cheese mixture. Spread it evenly. Now, add the entire can of cherry pie filling right over the top. Then, dollop on the remaining cream cheese mixture and spread it gently to cover the cherries. You’ll end up with these lovely layers of creaminess, fruitiness, and crunch.
Step 4: Chill
Pop that beauty into the fridge and let it chill for at least 4 hours, or overnight if you’ve got the patience. The chilling sets the filling and really lets the flavors meld.
Step 5: Garnish and Serve
Right before serving, top with extra whipped topping, a sprinkle of chocolate shavings, and if you’re feeling festive, a few maraschino cherries. The presentation is beautiful and totally worthy of a celebration—even if that celebration is just a Tuesday night dessert. 😉
Helpful Tips
-
Room Temp Cream Cheese: Let the cream cheese come to room temperature before mixing to avoid any lumps. It makes a huge difference in texture!
-
Don’t Overmix: When adding the whipped topping, use a folding motion. You want to keep the airiness intact for that light, mousse-like filling.
-
Make-Ahead Friendly: This pie is a dream for busy hosts—it’s even better the next day!
Substitutions and Variations
This pie is endlessly customizable, and I love that about it!
-
Crust Swap: Not a chocolate fan? (Gasp—but okay, I’ll allow it.) Use a graham cracker crust instead for a more traditional flavor.
-
Different Fruit Fillings: You can absolutely swap in blueberry or raspberry pie filling. Peach would be lovely too for a summer twist.
-
Homemade Whipped Cream: Want to go the extra mile? Use homemade whipped cream instead of store-bought topping. Just make sure it’s whipped to stiff peaks!
-
Add Nuts: Sprinkle in some chopped pecans or walnuts for a nutty crunch.
Frequently Asked Questions
Can I use fresh cherries instead of pie filling?
Yes! You can cook down fresh cherries with a bit of sugar and cornstarch to make a homemade filling. It adds a more natural sweetness and a gorgeous deep color.
Can I make this ahead of time?
Absolutely. In fact, I recommend it. The flavors develop more the longer it chills. Just add the garnishes right before serving.
Can I freeze it?
You sure can! Wrap it tightly in plastic wrap and foil, and freeze for up to a month. Let it thaw in the fridge overnight before serving.
Is this pie gluten-free?
It can be! Just make sure to use a gluten-free crust and double-check that your chocolate chips and pie filling are gluten-free too.
Storage Instructions
Store any leftovers (if you’re lucky enough to have some!) covered in the refrigerator for up to 3 days. I like to keep it in the same pie dish, tightly wrapped in plastic wrap or under a lid. If you’ve already garnished the top, just smooth things out a bit before serving again. It’s just as delicious the next day—maybe even more so.
More Recipes to Love
This Cherry Chocolate Cream Cheese Pie is everything I love in a dessert—easy to make, visually stunning, and bursting with flavor. It’s one of those recipes that feels like a celebration all on its own, yet it’s simple enough to whip up any day of the week. Whether you’re serving it at a special gathering or just treating yourself after dinner, it’s guaranteed to bring smiles all around.