

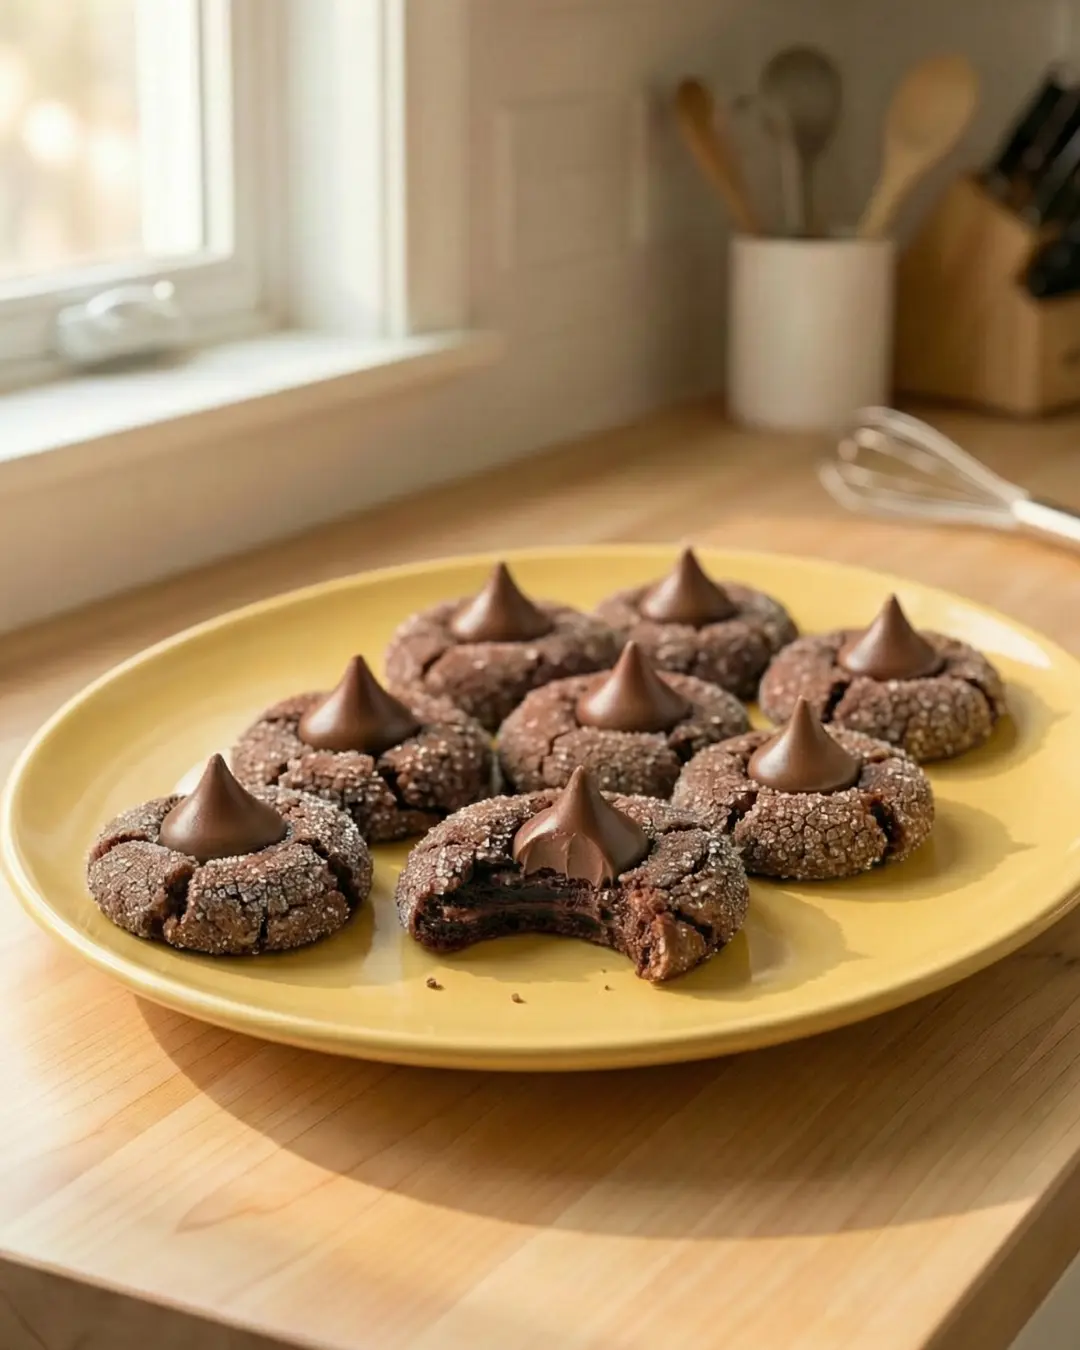
Chocolate Kiss Cookies are the ultimate easy holiday and everyday treat that combines rich cocoa‑flavored sugar cookies with a classic Hershey’s milk chocolate kiss right in the center. These soft and chewy cookies are irresistible, festive, and only require four simple ingredients. Whether you are baking with kids, planning a cookie exchange, or just craving something sweet and chocolatey, this recipe delivers maximum flavor with minimal effort. With a short prep time and straightforward steps, you’ll love how these cookies turn out perfectly soft, just the right amount of chewy, and beautifully topped with that iconic chocolate kiss every time. This is comfort baking at its finest.
Why You’ll Love These Chocolate Kiss Cookies
There are so many reasons you will fall in love with these Chocolate Kiss Cookies. First, it uses only four main ingredients that you likely already have at home or can easily find at the store. Second, these cookies have a soft and chewy texture that stays tender bite after bite. Third, the look of the cookie with the chocolate kiss nestled on top makes it perfect for gifting, sharing, or serving at any special occasion. This recipe also comes together quickly, allowing even novice bakers to succeed. Lastly, the customizable nature of the cookies means you can easily dress them up for holidays, birthdays, or themed parties with different colored sugars and chocolate variations.
Ingredients
To make approximately 26 Chocolate Kiss Cookies, you will need:
-
1 batch no spread sugar cookies (you can use our homemade no spread sugar cookies recipe or 1 roll of refrigerated sugar cookie dough)
-
½ cup unsweetened cocoa powder
-
1 cup coarse sanding sugar
-
26 Hershey’s milk chocolate kisses
These simple ingredients come together to create a rich and chewy chocolate cookie with a classic chocolate center that is both nostalgic and delightful.
Step‑by‑Step: How to Make Chocolate Kiss Cookies
Follow these easy instructions for perfect cookies every time:
-
Mix Dough and Cocoa:
In a large mixing bowl, use a hand mixer or stand mixer to thoroughly mix the sugar cookie dough and the unsweetened cocoa powder until well combined. The dough should be smooth and uniformly dark chocolate in color. -
Chill the Dough:
Cover the bowl with plastic wrap and chill the dough in the refrigerator for about one hour. This chilling step is essential to prevent the cookies from spreading too much in the oven so they stay nice and thick. -
Preheat Oven:
Preheat your oven to 350°F (177°C). Line a cookie sheet with parchment paper for easy cleanup and even baking. -
Form Cookie Balls:
Use a cookie scoop to form even balls of dough. Roll each ball in the palms of your hands until smooth. This ensures uniform cookies that bake evenly. -
Coat in Sugar:
Roll each cookie dough ball in coarse sanding sugar until completely coated. The sanding sugar adds a subtle crunch and sparkle to the cookies. -
Arrange on Sheet:
Place the sugar‑coated dough balls about 1½ inches apart on the prepared cookie sheet. Gently flatten the top of each ball with the palm of your hand to encourage even rising and spreading. -
Bake:
Bake in your preheated oven for 8 to 9 minutes, or until the cookies are puffed and the dough no longer looks wet on the surface. The centers may still look slightly underdone, and that’s perfect for keeping them soft. -
Add Chocolate Kisses:
Remove the cookie sheet from the oven and immediately press a Hershey’s milk chocolate kiss gently into the top of each warm cookie. The residual heat will help the chocolate adhere and soften just slightly. -
Cool:
Allow the cookies to cool on the baking sheet for a couple of minutes, then carefully transfer them to a cooling rack to finish cooling. Enjoy warm or at room temperature.
Helpful Tips
-
Don’t Skip Chilling: Allowing the dough to chill for at least an hour improves texture and prevents excessive spreading during baking.
-
Even Scoops: Use a cookie scoop for uniform cookies that bake evenly in the oven.
-
Right Timing for Kisses: Place the chocolate kisses on the cookies while they are still warm from the oven so they stick and slightly melt into the top. If the cookies cool completely first, the chocolate won’t adhere as well.
-
Watch Baking Time: Remove the cookies right when they no longer look wet on top. Overbaking will make them dry rather than soft and chewy.
-
Storage Prep: Let the cookies cool completely before storing to prevent condensation and sogginess.
Substitutions and Variations
This Chocolate Kiss Cookies Recipe is wonderfully versatile. Here are some great swaps and flavor upgrades:
-
Chocolate Varieties: Substitute dark chocolate kisses, white chocolate kisses, or caramel‑filled kisses for a different flavor experience.
-
Colored Sugars: Use colored sanding sugar for themed occasions like red and green for Christmas or pastel colors for Easter.
-
Peppermint Twist: Add a tiny peppermint candy or a few drops of peppermint extract to the dough for festive mint chocolate cookies.
-
Nutty Add‑Ins: Fold in finely chopped nuts like pecans or walnuts for extra texture and flavor.
-
Gluten‑Free Option: Use gluten‑free sugar cookie dough or a gluten‑free baking mix in place of regular dough to accommodate dietary preferences.
-
Extra Cocoa Punch: For richer flavor, add 1–2 tablespoons of Dutch‑processed cocoa powder in place of some of the unsweetened cocoa.
These simple variations help you tailor the classic recipe to your taste or holiday theme.
Storage Instructions
Proper storage keeps your Chocolate Kiss Cookies fresh and delicious:
-
Room Temperature: Store cooled cookies in an airtight container at room temperature for up to 4 days.
-
Layering: Place parchment paper between layers to prevent sticking and preserve the cookie surfaces.
-
Refrigeration: If your kitchen is warm or you want to extend freshness, store the cookies in the refrigerator for up to one week. Allow to come to room temperature before serving.
-
Freezing: Freeze baked cookies in a single layer on a baking sheet, then transfer to freezer‑safe bags or containers. They will keep well for up to 3 months. Thaw at room temperature when ready to enjoy.
Nutritional Information
Here’s the approximate nutrition per cookie based on a batch yield of 26 cookies:
-
Calories: 56 kcal
-
Carbohydrates: 11 g
-
Protein: 1 g
-
Fat: 2 g
-
Saturated Fat: 1 g
-
Sugar: 10 g
-
Fiber: 1 g
-
Sodium: 4 mg
-
Calcium: 11 mg
-
Iron: 1 mg
These values are estimates and can vary based on specific ingredients and brands used.
Serving Suggestions
Serve your Chocolate Kiss Cookies with:
-
Cold Milk: A classic pairing, especially for kids and holiday gatherings.
-
Coffee or Hot Cocoa: Perfect for adults or cozy afternoons by the fire.
-
Ice Cream Sandwiches: Use slightly cooled cookies to make mini ice cream sandwiches for a decadent dessert.
-
Dessert Platter: Add these to a platter with other cookies and sweets for parties and celebrations.
-
Gift Boxes: Wrap in festive boxes or bags with ribbons for neighbor gifts during holiday seasons.
These cookies fit every occasion from casual snack time to special events.
Frequently Asked Questions About Chocolate Kiss Cookies
How do I prevent my cookies from spreading too much? Always chill the dough before baking. Chilled dough spreads less because the fats have solidified and release more slowly in the oven. Also, avoid overworking the dough once chilled.
Can I use homemade sugar cookie dough? Absolutely. Homemade no-sugar-spread sugar cookie dough works beautifully for this recipe. If your dough does not include leaveners, make sure it is chilled well to get a good texture.
What is the best way to store leftover cookies? Store completely cool cookies in an airtight container. You can freeze baked cookies for months and thaw when ready to serve. They also stay fresh at room temperature for several days if well sealed.
Can I make them ahead of time? Yes. You can prepare the dough, form the balls, roll them in sugar, and refrigerate them overnight before baking. Just add the chocolate kisses after baking and cooling slightly.
Why won’t my chocolate kiss stick to the cookie? The key is to press the Hershey’s kiss into the cookie while it is still warm from the oven. If the cookie cools completely, the chocolate will not adhere properly.
These FAQs cover common issues and help ensure you get perfect cookies each time you bake.
Final Thoughts
Thank you for trying these Chocolate Kiss Cookies. I hope these soft and chewy treats bring a smile to your face and warmth to your kitchen. These cookies are one of my favorite easy desserts to make and share because they are delicious, comforting, and so fun to bake. With only a few simple ingredients and straightforward steps, anyone can create bakery‑worthy cookies right at home. I appreciate you being part of this food‑loving community, and I wish you many joyful moments with each sweet, chocolatey bite. Happy baking and enjoy every single cookie!
Join us on Pinterest for new mouthwatering recipes every day!
Print
Chocolate Kiss Cookies
- Total Time: 1 hour 19 minutes
- Yield: 26 cookies 1x
- Diet: Vegetarian
Description
Chocolate Kiss Cookies made with only 4 simple ingredients. Soft, chewy, and topped with a Hershey’s kiss, they’re the perfect treat for holidays, parties, or anytime you’re craving chocolate. Quick to prep, easy to bake, and always a hit. Try this no-fuss cookie recipe today!
Ingredients
1 batch no spread sugar cookie dough (or 1 roll refrigerated sugar cookie dough)
½ cup unsweetened cocoa powder
1 cup coarse sanding sugar
26 Hershey’s milk chocolate kisses
Instructions
Follow these easy instructions for perfect cookies every time:
-
Mix Dough and Cocoa:
In a large mixing bowl, use a hand mixer or stand mixer to thoroughly mix the sugar cookie dough and the unsweetened cocoa powder until well combined. The dough should be smooth and uniformly dark chocolate in color. -
Chill the Dough:
Cover the bowl with plastic wrap and chill the dough in the refrigerator for about one hour. This chilling step is essential to prevent the cookies from spreading too much in the oven so they stay nice and thick. -
Preheat Oven:
Preheat your oven to 350°F (177°C). Line a cookie sheet with parchment paper for easy cleanup and even baking. -
Form Cookie Balls:
Use a cookie scoop to form even balls of dough. Roll each ball in the palms of your hands until smooth. This ensures uniform cookies that bake evenly. -
Coat in Sugar:
Roll each cookie dough ball in coarse sanding sugar until completely coated. The sanding sugar adds a subtle crunch and sparkle to the cookies. -
Arrange on Sheet:
Place the sugar‑coated dough balls about 1½ inches apart on the prepared cookie sheet. Gently flatten the top of each ball with the palm of your hand to encourage even rising and spreading. -
Bake:
Bake in your preheated oven for 8 to 9 minutes, or until the cookies are puffed and the dough no longer looks wet on the surface. The centers may still look slightly underdone, and that’s perfect for keeping them soft. -
Add Chocolate Kisses:
Remove the cookie sheet from the oven and immediately press a Hershey’s milk chocolate kiss gently into the top of each warm cookie. The residual heat will help the chocolate adhere and soften just slightly. -
Cool:
Allow the cookies to cool on the baking sheet for a couple of minutes, then carefully transfer them to a cooling rack to finish cooling. Enjoy warm or at room temperature.
Notes
Use colored sanding sugar to match holiday or party themes.
Chill the dough to avoid flat cookies and get that perfect thick, chewy texture.
Press the chocolate kiss in while the cookies are warm so it sticks properly.
- Prep Time: 10 minutes Chill Time: 1 hour
- Cook Time: 9 minutes
- Category: Dessert
- Method: Baking
- Cuisine: American
Nutrition
- Serving Size: 1 cookie
- Calories: 56 kcal
- Sugar: 10g
- Carbohydrates: 11g
- Protein: 1g