

No Bake Peppermint Patties are a refreshing, homemade treat that brings together the cool bite of mint and the richness of chocolate in just a few simple steps. If you’ve ever wanted to skip the store‑bought sweets and whip up something that looks elegant, tastes fantastic, and uses only six core ingredients, this recipe is for you. With minimal equipment and no complex candy‑making techniques required, you’ll feel proud and excited as you shape, chill, and dip your patties. Let’s dive in and make something truly delicious!
Why You’ll Love These No Bake Peppermint Patties
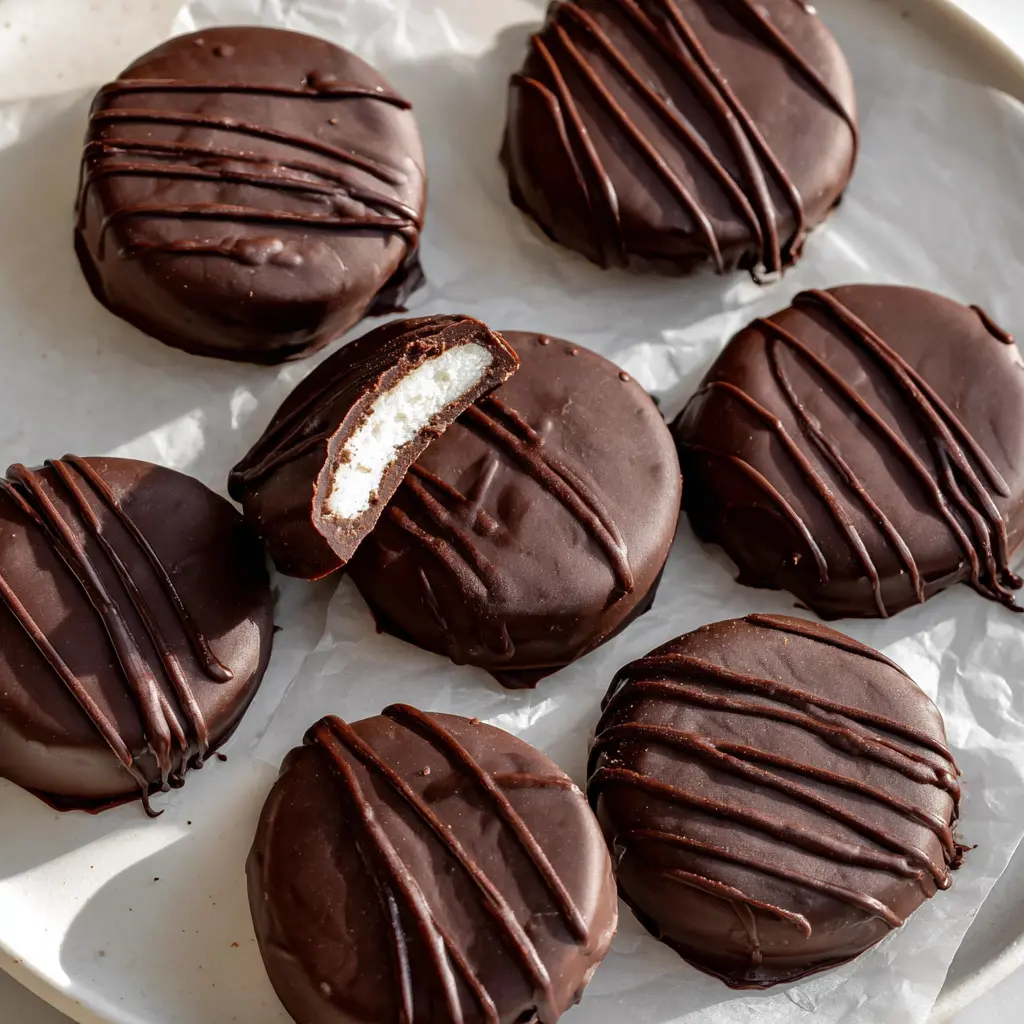
There’s something magical about that first bite of a peppermint patty—the crisp, dark chocolate shell giving way to a creamy, mint‑filled centre. With this recipe, you’re in control: you choose the intensity of the peppermint flavour, the chocolate you prefer (dark, semi‑sweet, milk), and you set the size that works for you. Because it only takes six ingredients, it’s accessible even when your pantry is modest. And best of all: these patties make fantastic gifts, festive treats, or little bites of joy to hide away for yourself.
Ingredients
Peppermint Filling
- 570 g powdered sugar (sifted)
- Pinch of salt
- 40 g unsalted butter (at room temperature)
- 3 tsp peppermint extract (strength depends on your brand—adjust to taste)
- 40 g full‑fat milk
Chocolate Coating
- 300 g dark chocolate (e.g., 72% cocoa), chopped
- 12 g neutral‑flavour oil (such as grape‑seed or canola)
Step‑by‑Step: How to Make No Bake Peppermint Patties
- In the bowl of a stand mixer fitted with the paddle attachment (or in a large bowl using an electric hand mixer), combine the powdered sugar, salt, and butter. Beat on medium speed until the butter is fully blended into the mixture.
- Add the peppermint extract and milk, then mix until the dough comes together. The mixture will initially be crumbly, but it should form a stiff dough that holds together when squeezed.
- Turn the dough out onto a piece of baking paper (parchment). Knead together until a uniform dough forms.
- Top with a second piece of baking paper, then roll out the dough (between the two sheets of baking paper) until it’s about 1 cm (0.4″) thick.
- Place the dough (still between the parchment sheets) on a sheet pan then set into the freezer for 30 minutes (or up to overnight) to firm up.
- Once firm, remove from the freezer and peel off the top parchment sheet. Using a round cookie cutter (approx. 1 ¾” / 4.5 cm diameter), cut rounds of the dough and place them onto a baking‑paper‑lined tray. Re‑roll scraps as needed, then chill briefly before cutting again.
- Place the cut discs on the tray and freeze for another 20 minutes to firm up completely.
- To make the chocolate coating: either melt the chocolate and oil together over a pan of simmering water (double boiler method), stirring until smooth; OR place the chocolate and oil in a medium bowl and microwave in 30‑second intervals, stirring between each until melted and smooth.
- Line a tray with baking paper to receive the dipped patties. Have a cloth nearby to wipe hands/utensils—dipping can get a little messy. Work in batches: only take a few patties out of the freezer at a time (keep the rest frozen so they remain firm).
- Using two forks (or a dipping tool), dip each frozen patty into the melted chocolate, flipping to coat fully and allowing excess chocolate to drip off. You may lightly tap the fork side of the bowl to remove excess.
- Transfer each coated patty to the prepared tray. Once all are dipped, return the tray to the freezer for about 5 minutes to set. If you like, use the remaining melted chocolate in a piping bag (or a zip‑lock with a small snip) to drizzle extra chocolate over the patties before freezing again until fully solid.
- Store the finished patties in an airtight container: they stay fresh in the refrigerator for up to two weeks, or in the freezer for up to one month.
Helpful Tips
- Make sure your patty discs are firm and cold before dipping in chocolate: this helps them hold shape and prevents the chocolate from sliding off.
- When melting chocolate, avoid introducing any water (or steam) into the bowl – even a drop can cause the chocolate to seize.
- Work in batches: only remove a few patties from the freezer at a time so that they stay firm and you can dip neatly.
- If your peppermint mixture is too crumbly, you can knead in a little extra milk or soften the butter more. If it’s too sticky, freeze for a few minutes, then roll.
- Using a neutral oil with your chocolate helps create a smoother coating and makes dipping easier.
- You can decorate with a drizzle of chocolate or even a sprinkle of crushed peppermint candies immediately after dipping, before the coating sets.
Substitutions And Variations
- Extract vs oil: The recipe uses peppermint extract—if you use peppermint oil instead, it will be much stronger. Use sparingly (¼‑½ tsp) and adjust taste.
- Chocolate type: Switch the dark chocolate to semi‑sweet or milk chocolate if you prefer a milder flavour.
- Flavour twist: Replace the peppermint extract with orange, raspberry, or almond extract for a different filling flavour.
- Shape & size: Instead of rounds, you could press the dough into a log, chill, and slice into discs; or make mini bite‑sized patties. Just note that smaller sizes chill more quickly and may be easier to handle.
- Decorations: For a festive look, after dipping you can sprinkle crushed candy cane bits on top, or drizzle white chocolate.
- Dietary tweaks: To make them gluten‑free, ensure your powdered sugar and chocolate are certified gluten‑free. You could also experiment replacing butter with a dairy‑free alternative for vegan adaptation (though texture may vary).
Storage Instructions
Store the patties in an airtight container. If your kitchen is warm or if you used milk chocolate, it’s best to keep them in the fridge to prevent the coating from softening. Layer patties with parchment or wax paper between each layer to prevent sticking. They stay fresh in the refrigerator for up to two weeks. If you want longer storage, freeze them for up to one month—when ready to enjoy, let them sit out 2–3 minutes to slightly soften before serving.
Nutritional Information
Because this is a treat recipe and I don’t have full branded ingredient values for your exact portions, treat the following as an approximate guideline:
- Each patty (assuming about 30–35 patties from the batch) might contain roughly ~90‑120 calories, depending on size and chocolate type.
- Major contributors: powdered sugar (carbohydrates/sugar), butter (fat), chocolate (fat and sugar), milk (small protein/carbs).
- If you use dark chocolate (72% cocoa) you’ll have slightly less sugar and more cocoa solids compared to milk chocolate.
- For precise nutritional data, measure your actual yield (number of patties) and input your exact ingredient brands into a nutrition‑calculator.
Serving Suggestions
These peppermint patties are a delightful after‑dinner bite alongside coffee, tea, or even hot chocolate. They make a lovely edible gift—present them in a decorative tin or cellophane bag tied with a ribbon. At holiday gatherings, place them on a dessert platter with cookies and chocolates to offer guests a mint‑chocolate option. You can also serve them slightly chilled or straight from the freezer for an extra crisp experience.
Frequently Asked Questions About No Bake Peppermint Patties
Can I make the filling ahead of time and dip later?
Yes! You absolutely can make the peppermint dough, roll and chill it, even freeze the shaped discs, then dip them in chocolate later. Chilling ahead gives more flavour melding and makes the dipping step smoother.
My chocolate coating looks dull or has bloomed. What happened?
Chocolate bloom (whiteish streaking or speckling) can happen if there’s moisture introduced, or if the chocolate has been handled roughly or stored improperly. To avoid that: make sure your dipping equipment is dry, work quickly in a cool space, and store the finished patties in a cool, dry spot. Freezing and then thawing can cause condensation which also leads to bloom.
The filling was too soft and wouldn’t hold shape when I cut it.
If the dough is too soft, chill it longer (in freezer or fridge) until firm enough to cut. You might also need to adjust by adding a little more powdered sugar or reducing milk slightly. Using good chilled discs helps with the dipping step.
Can I skip the oil in the chocolate coating?
You could, but adding a little neutral oil helps make the melted chocolate smoother and easier to dip with better flow and shine. If omitted, you may find the coating a bit thicker and harder to work with.
Are these gluten‑free?
Yes, the base ingredients (powdered sugar, butter, milk, chocolate) are naturally gluten‑free. However, always verify that your chocolate and powdered sugar are certified gluten‑free if you’re serving someone with gluten sensitivity.
Final Thoughts
Thank you so much for following this no bake Peppermint Patties recipe with me—I absolutely love how simple and satisfying it is. From the little bowl of peppermint mixture to the freezer tray, to the dipping station and ultimately that first bite of creamy mint centre and crisp dark chocolate shell—it’s one of those treats that feels both elegant and homey. I hope you enjoy making these as much as I do, and that they bring you joy whether you share them or keep them all to yourself. Happy cooking, enjoy the ease and flavor of the dish, and thank you for being part of this food‑loving community. Well‑wishes for many delicious moments ahead!
Join us on Pinterest for new mouthwatering recipes every day!
Print
No Bake Peppermint Patties
- Total Time: 1 hour (includes freezing)
- Yield: About 30–35 patties 1x
Description
These No-Bake Peppermint Patties are a cool, chocolatey treat you can make at home using pantry staples. They’re rich, refreshing, and great for gifting or storing for later snacking. Simple ingredients, big flavor, no fuss.
Ingredients
570g powdered sugar, sifted
Pinch of salt
40g unsalted butter, room temp
3 tsp peppermint extract
40g full-fat milk
300g dark chocolate (72%), chopped
12g neutral oil
Instructions
- In the bowl of a stand mixer fitted with the paddle attachment (or in a large bowl using an electric hand mixer), combine the powdered sugar, salt, and butter. Beat on medium speed until the butter is fully blended into the mixture.
- Add the peppermint extract and milk, then mix until the dough comes together. The mixture will initially be crumbly, but it should form a stiff dough that holds together when squeezed.
- Turn the dough out onto a piece of baking paper (parchment). Knead together until a uniform dough forms.
- Top with a second piece of baking paper, then roll out the dough (between the two sheets of baking paper) until it’s about 1 cm (0.4″) thick.
- Place the dough (still between the parchment sheets) on a sheet pan then set into the freezer for 30 minutes (or up to overnight) to firm up.
- Once firm, remove from the freezer and peel off the top parchment sheet. Using a round cookie cutter (approx. 1 ¾” / 4.5 cm diameter), cut rounds of the dough and place them onto a baking‑paper‑lined tray. Re‑roll scraps as needed, then chill briefly before cutting again.
- Place the cut discs on the tray and freeze for another 20 minutes to firm up completely.
- To make the chocolate coating: either melt the chocolate and oil together over a pan of simmering water (double boiler method), stirring until smooth; OR place the chocolate and oil in a medium bowl and microwave in 30‑second intervals, stirring between each until melted and smooth.
- Line a tray with baking paper to receive the dipped patties. Have a cloth nearby to wipe hands/utensils—dipping can get a little messy. Work in batches: only take a few patties out of the freezer at a time (keep the rest frozen so they remain firm).
- Using two forks (or a dipping tool), dip each frozen patty into the melted chocolate, flipping to coat fully and allowing excess chocolate to drip off. You may lightly tap the fork side of the bowl to remove excess.
- Transfer each coated patty to the prepared tray. Once all are dipped, return the tray to the freezer for about 5 minutes to set. If you like, use the remaining melted chocolate in a piping bag (or a zip‑lock with a small snip) to drizzle extra chocolate over the patties before freezing again until fully solid.
- Store the finished patties in an airtight container: they stay fresh in the refrigerator for up to two weeks, or in the freezer for up to one month.
Notes
Use peppermint extract, not peppermint oil unless adjusting strength. Keep patties cold while dipping for best results.
- Prep Time: 25 minutes
- Cook Time: 5 minutes
- Category: Dessert
Nutrition
- Serving Size: 1 patty
- Calories: 95
- Sugar: 13g
- Carbohydrates: 18g
- Protein: 1g